Great Chat
This WhatsApp clone project provides a comprehensive chat application with various advanced features. Below are the main components and functionalities of the project.
Project Features
-
Account Functionality:
Complete account management.
-
PostgreSql Integration:
Utilized as a database.
-
AWS S3/MinIO Integration:
For file storage.
-
Redis Integration:
Utilized for caching and message pub/sub.
-
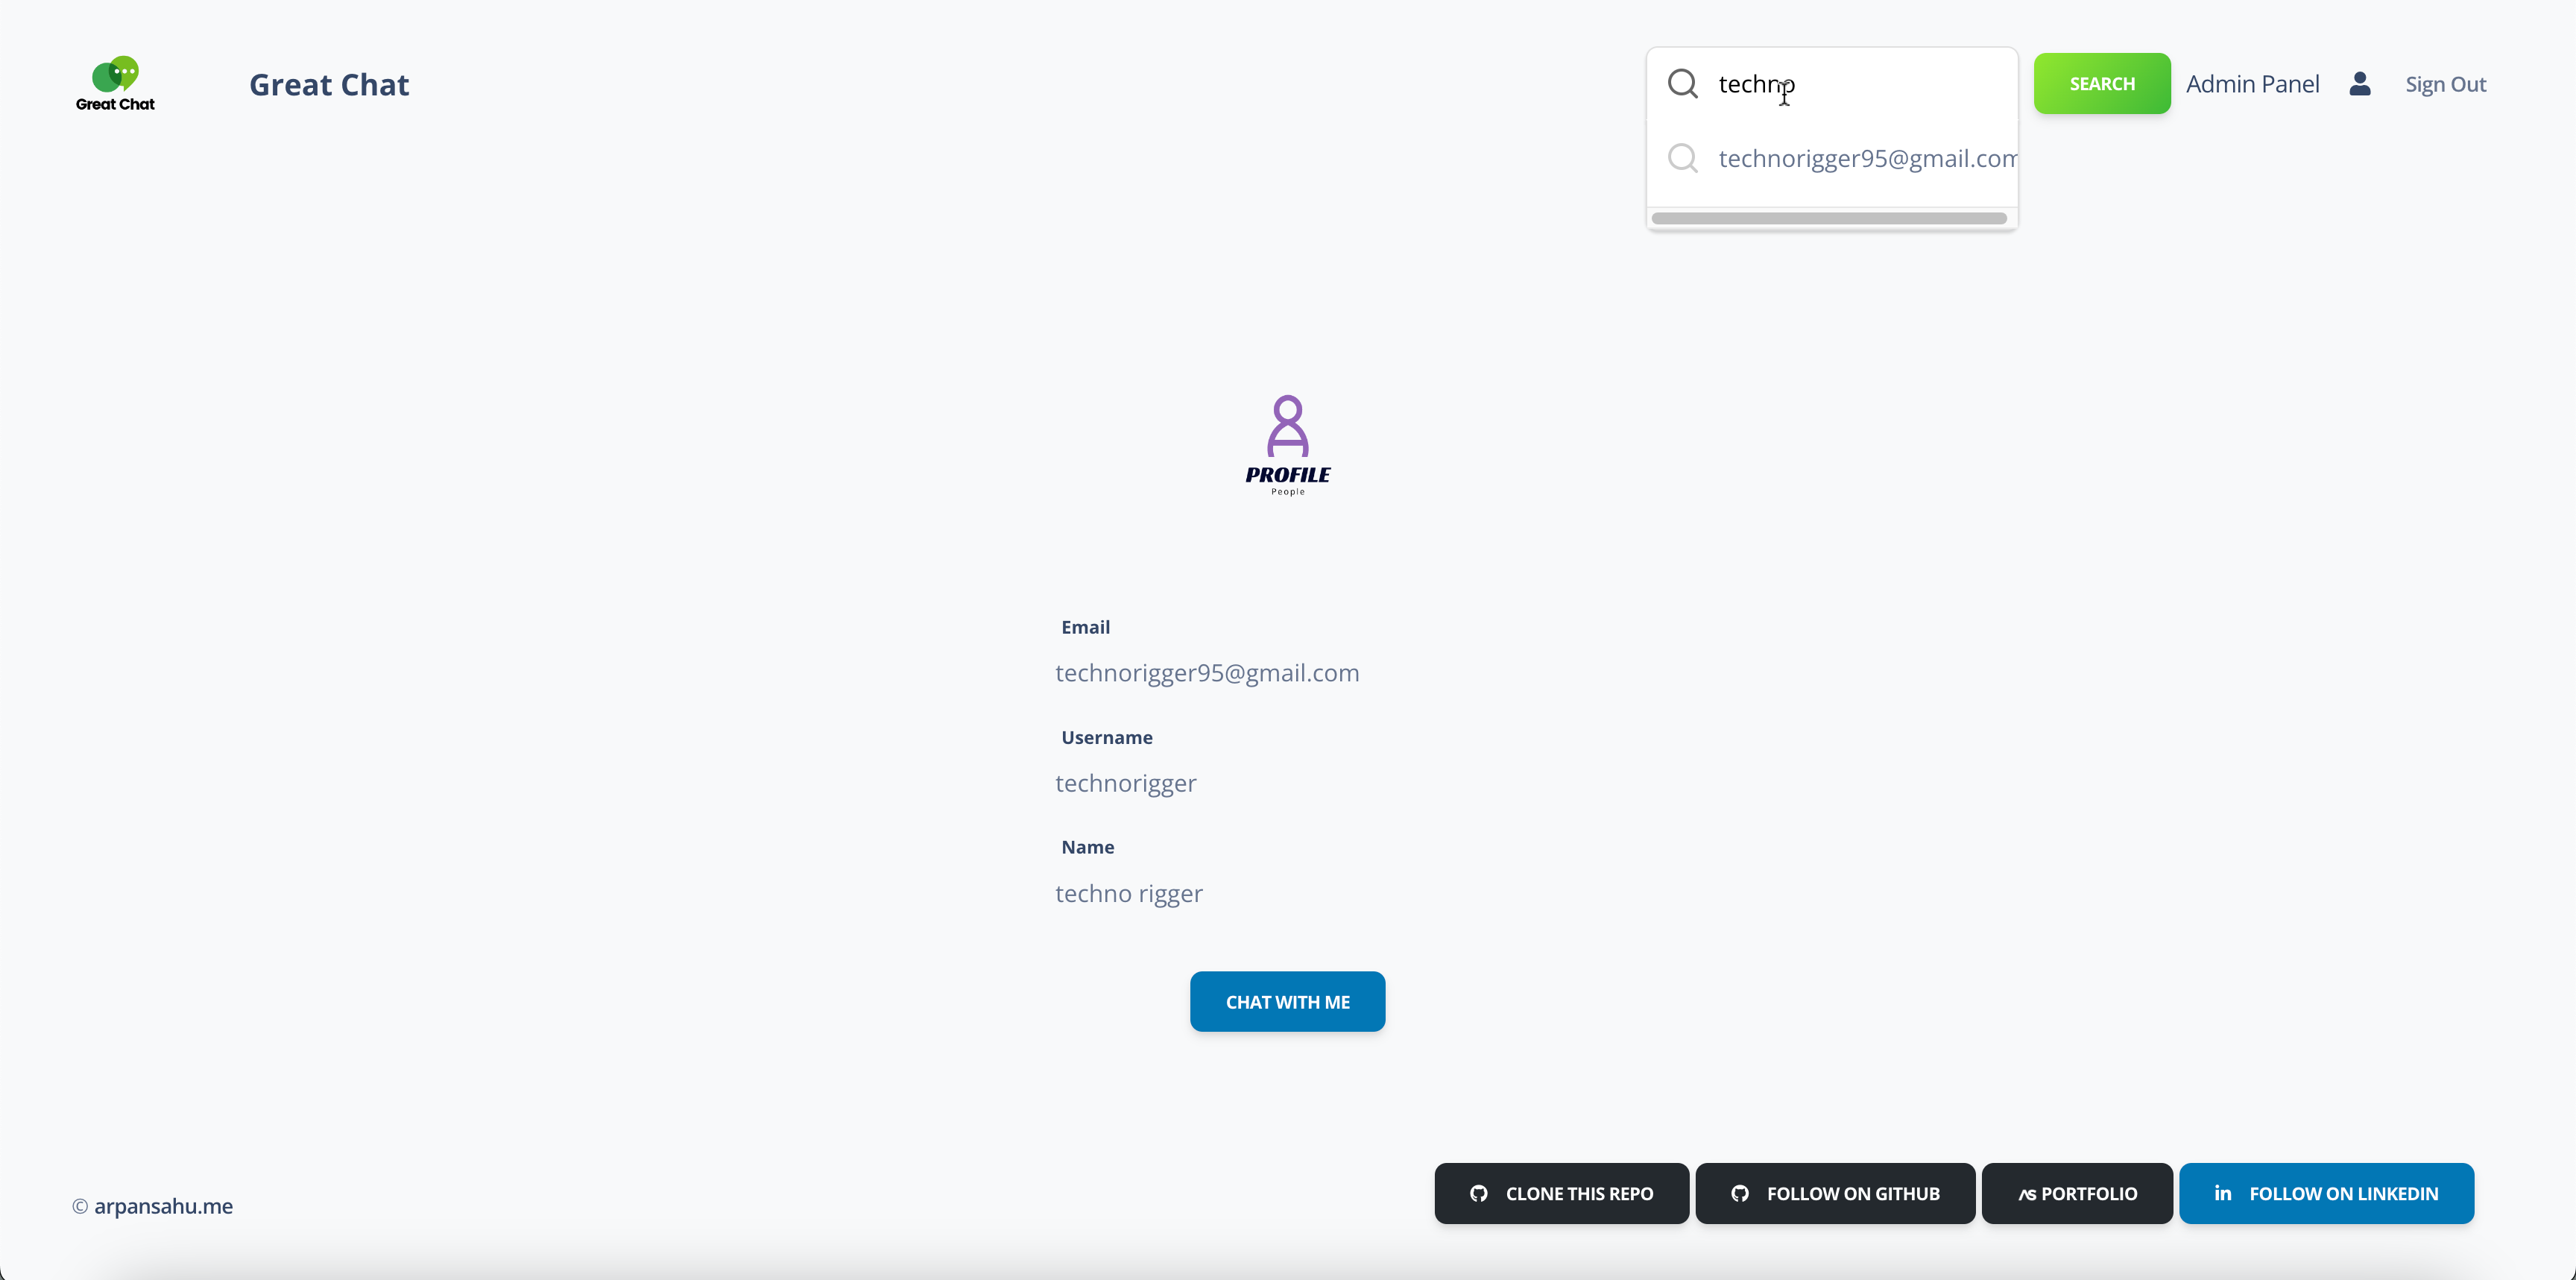
Autocomplete JS Library:
Implemented for enhanced user experience.
-
MailJet Integration:
Used for email services.
-
Dockerized Project:
Fully containerized for easy deployment.
-
Kubernetes-native
Kubernetes support also available.
-
CI/CD Pipeline:
Continuous integration and deployment included using Jenkins.
-
Sentry Integrated:
Logging and Debugging Made Easy.
WhatsApp Clone Functionalities
-
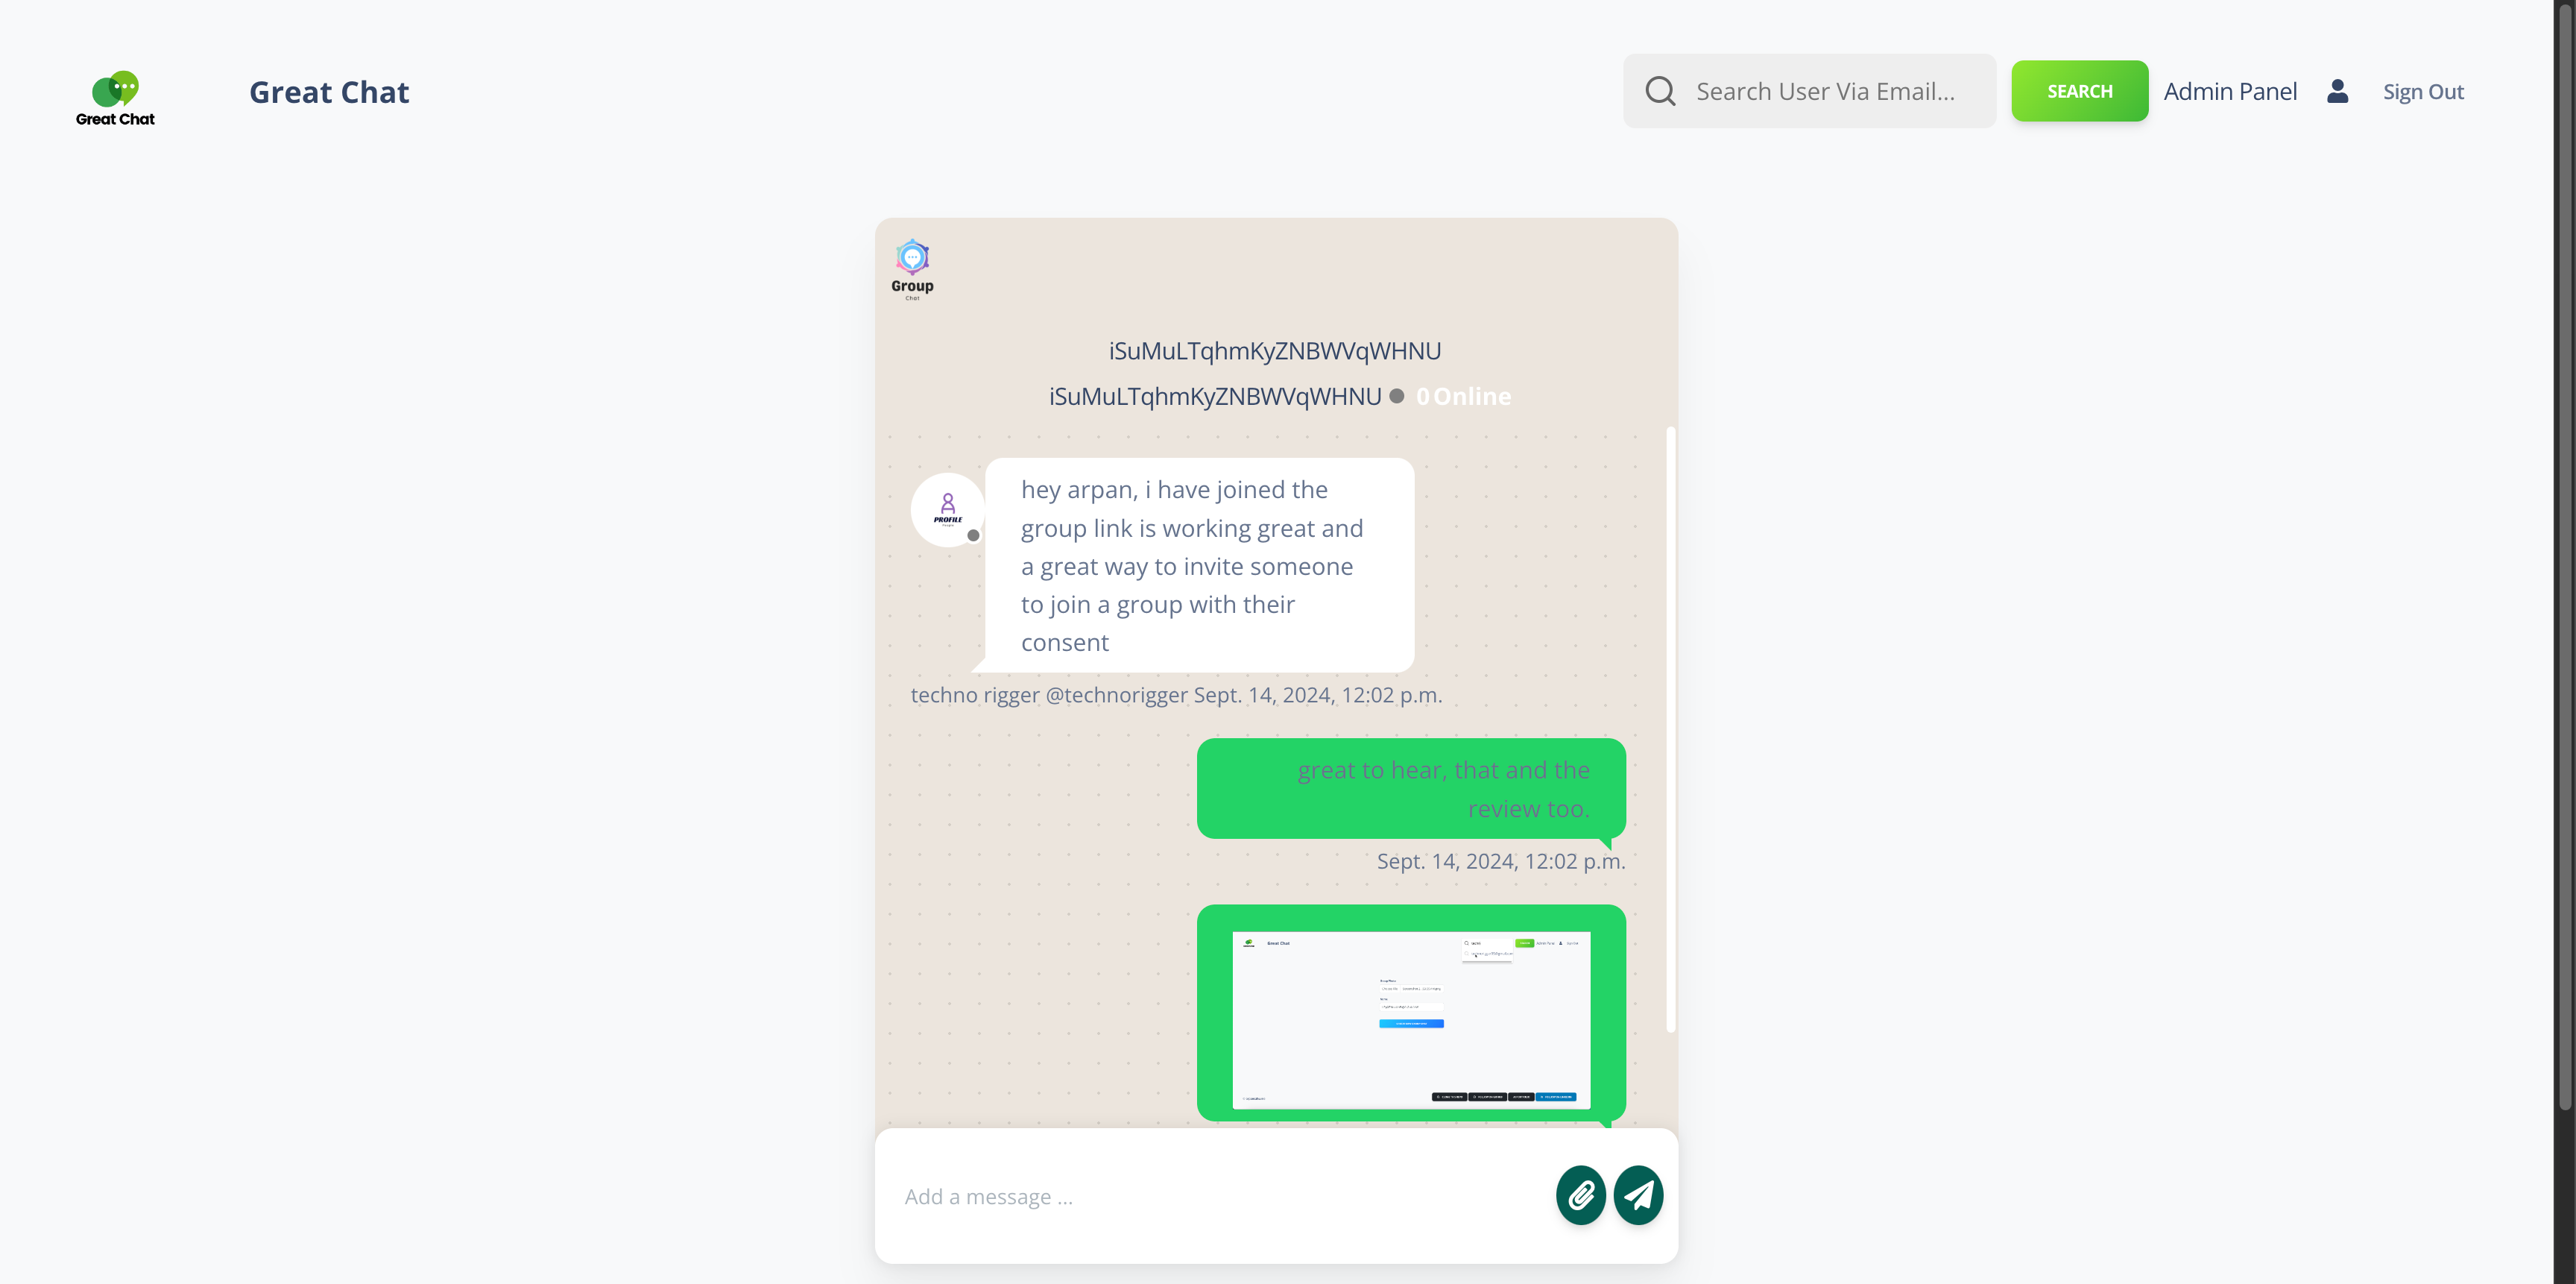
Messaging:
-
Send text messages and files.
-
Download files via download links.
-
View images and GIFs directly in the chat.
-
Private Chat:
-
Chat privately with your contacts.
-
Search your private contacts.
-
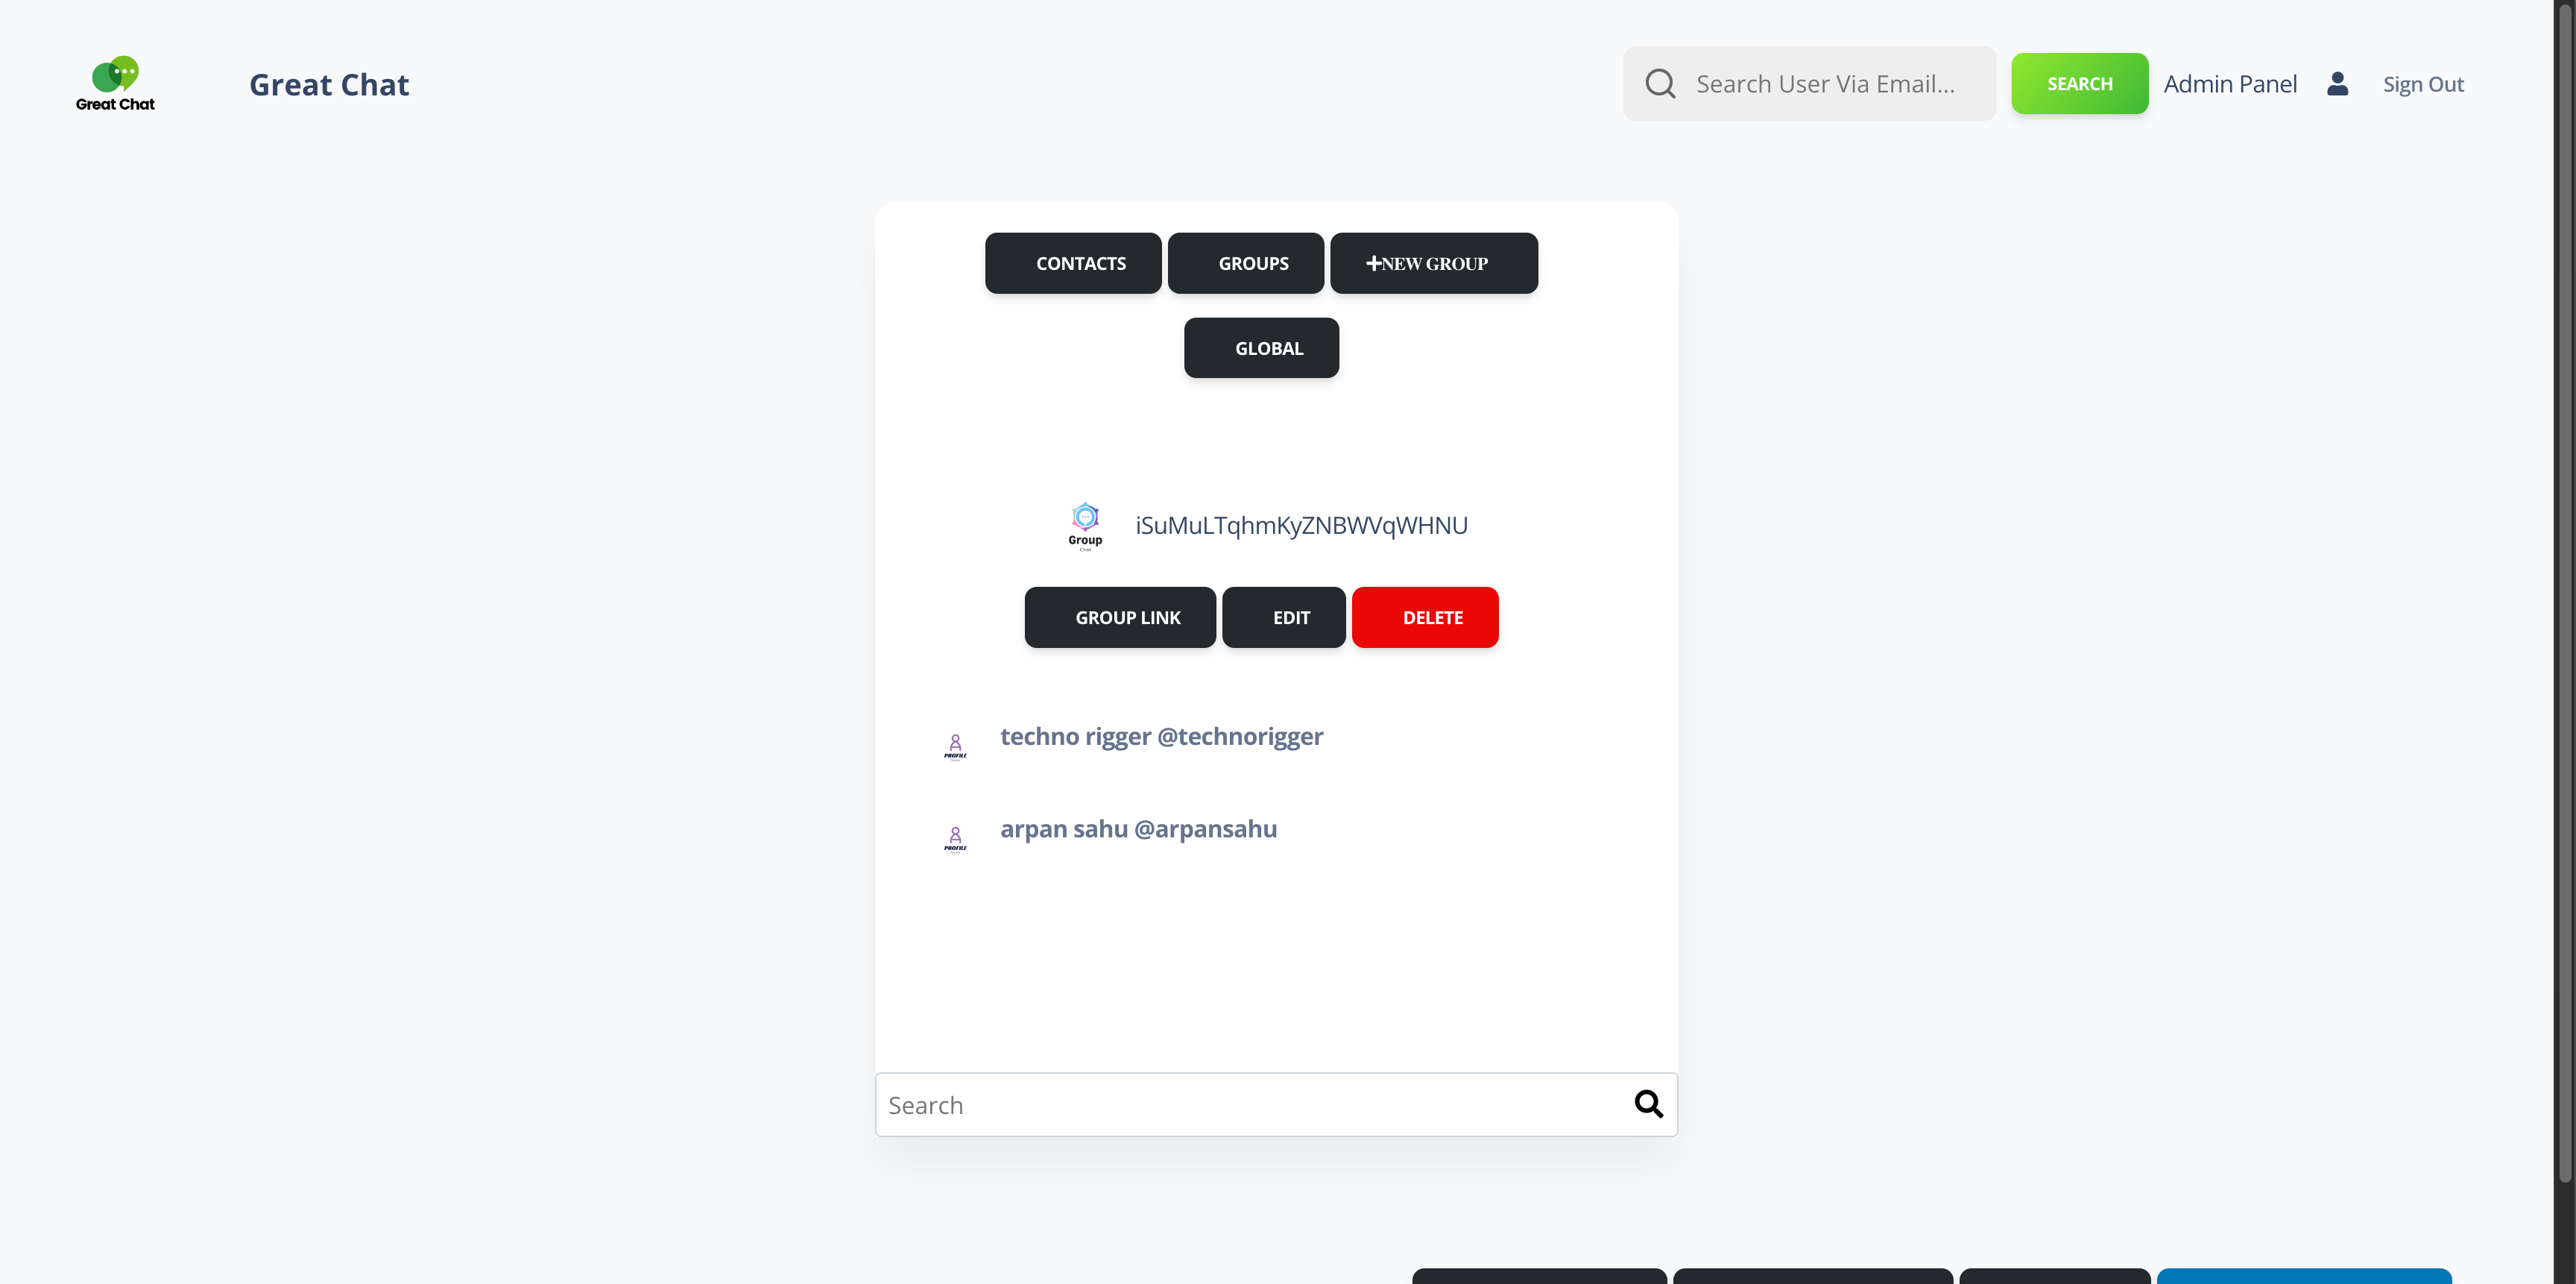
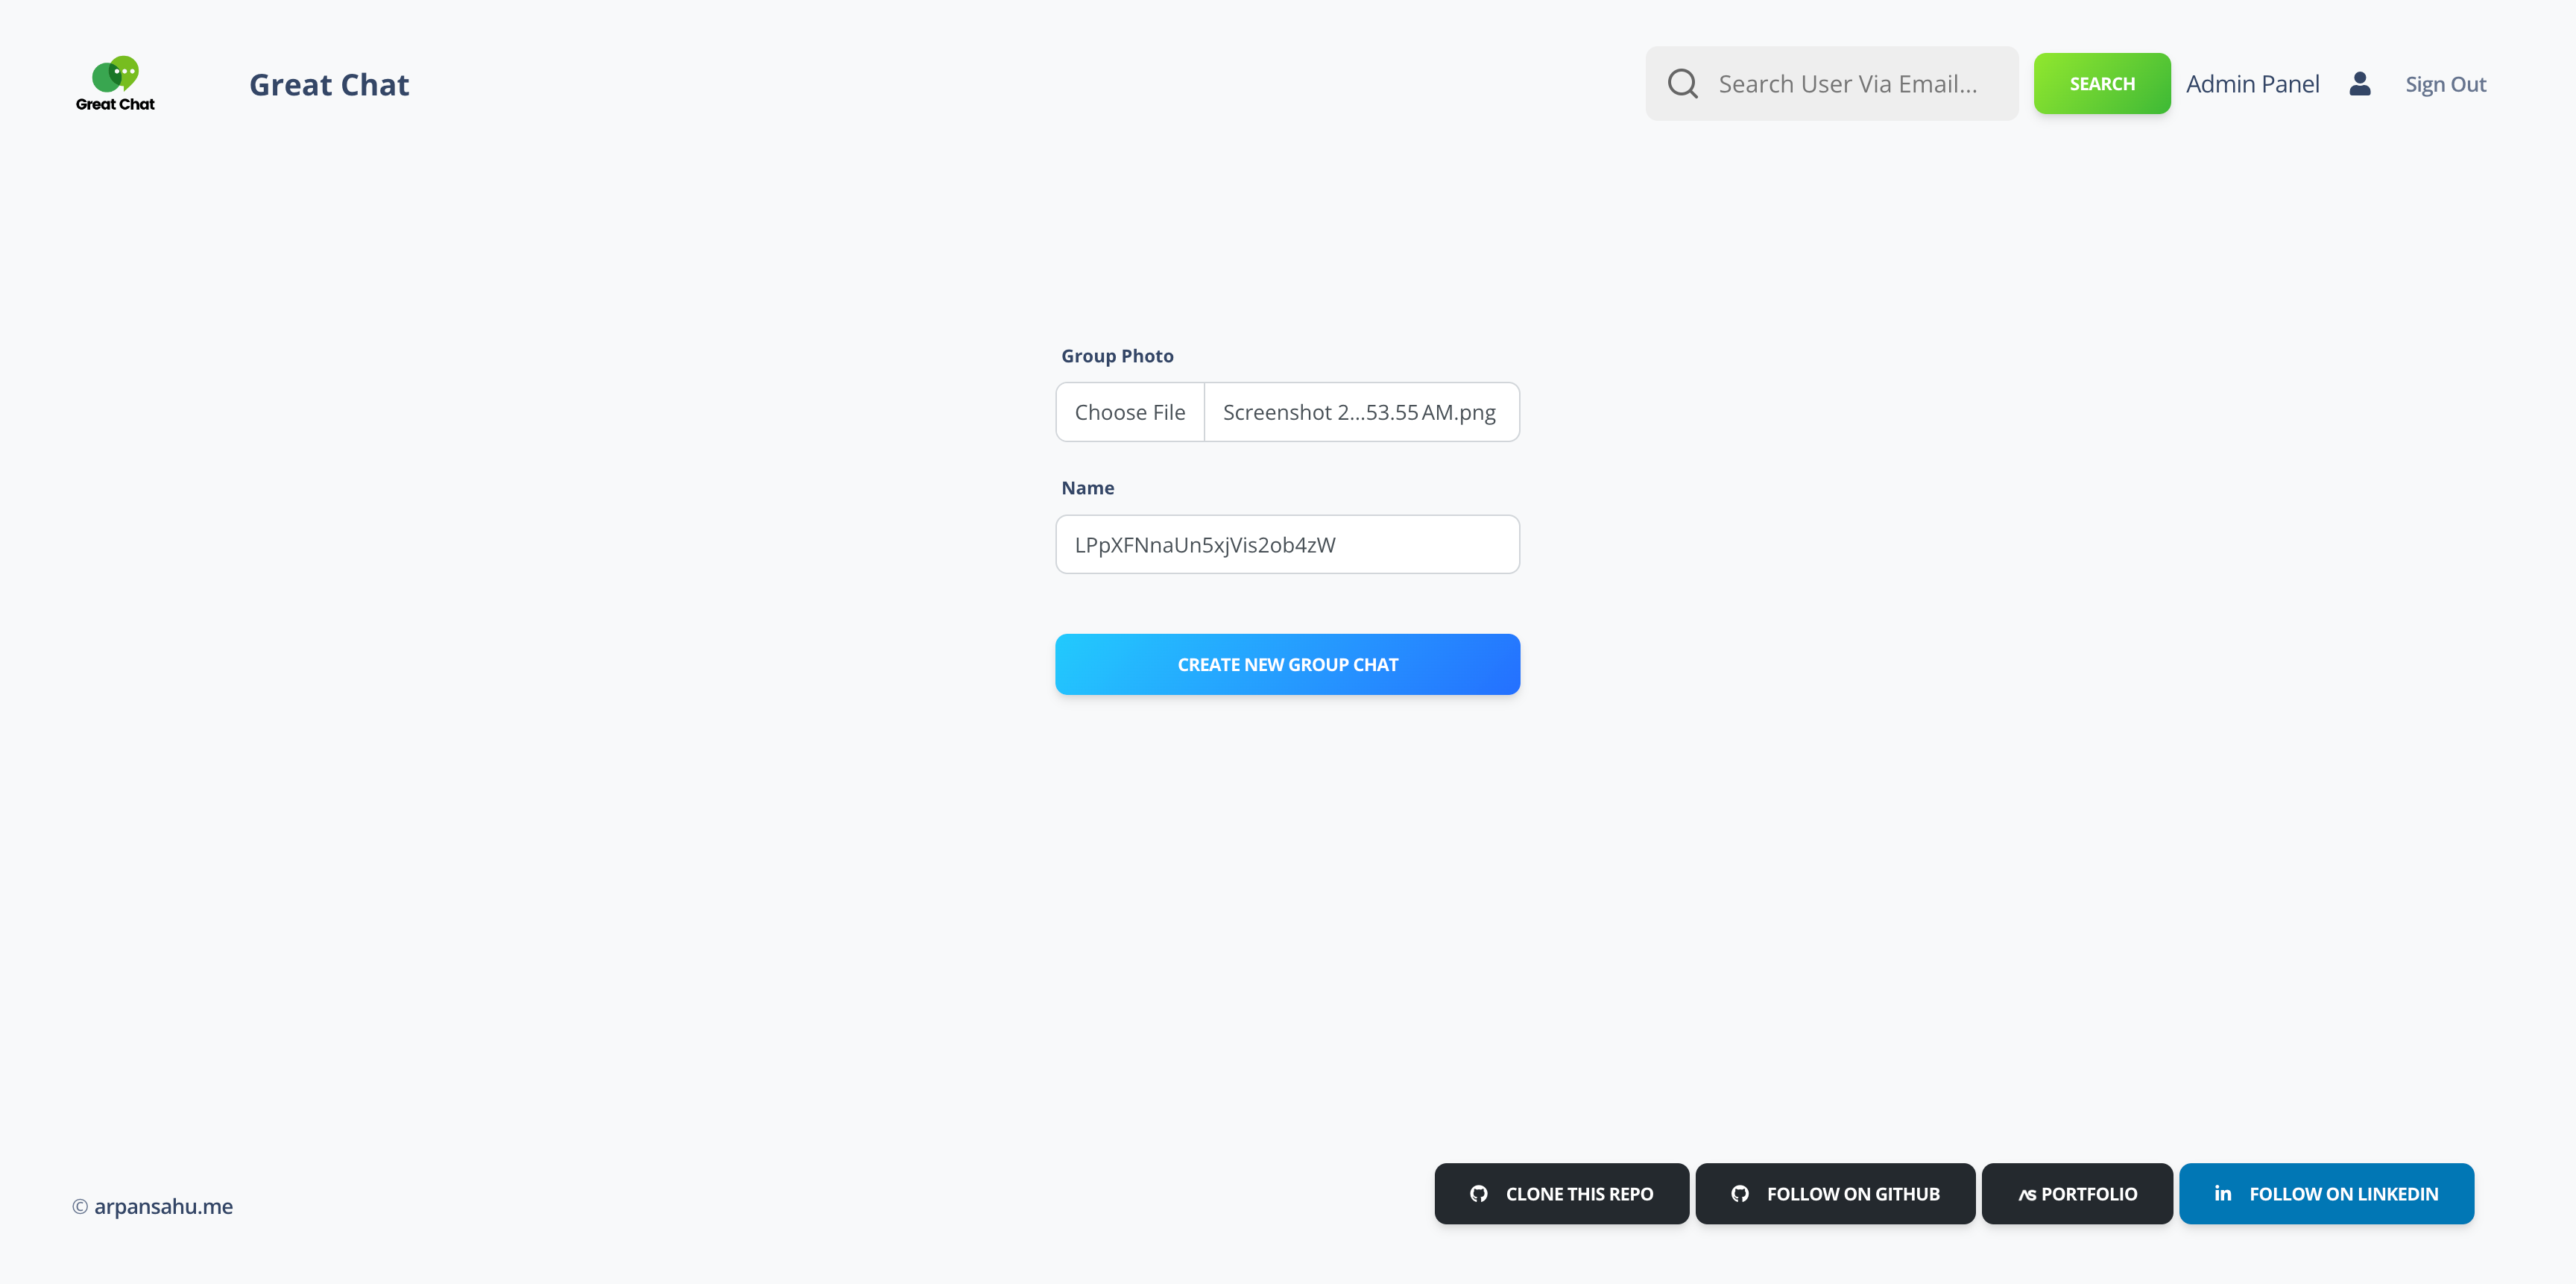
Group Chat:
-
Chat with friends or others in private groups.
-
Invite people to your private group.
-
Leave a group chat if desired.
-
Admins can delete their own group chats.
-
Remove members from your own group.
-
Global Chat:
-
Participate in a global chat room.
-
Profile Management:
-
Set profile photos.
-
Set group chat photos.
-
Message Display:
-
View the last 30 messages.
-
See user online/offline status.
-Deployed on AWS / Now in My Own Home Ubuntu Server LTS 22.0 / Hostinger VPS Server
-
Used Ubuntu 22.0 LTS
-
Used Nginx as a Web Proxy Server
-
Used Let's Encrypt Wildcard certificate
-
Used Acme-dns server for automating renewal of wildcard certificates
-
Used docker/kubernetes to run inside a container since other projects are also running on the same server. Can be managed using Portainer and Kube Dashboard. Running at https://portainer.arpansahu.me and https://kube.arpansahu.me respectively.
-
Used Jenkins for CI/CD Integration Jenkins Server. Running at: https://jenkins.arpansahu.me
-
Used Self Hosted Redis VPS for redis which is not accessible outside AWS, Used Redis Server, hosted on Home Server itself as Redis on Home Server
-
Used PostgresSql Schema based Database, all projects are using single Postgresql.
-
PostgresSQL is also hosted on VPS Server Itself.
-
Using MinIO as self hosted S3 Storage Server. Running at: https://minio.arpansahu.me
-
Using Harbor as Self Hosted Docker Registry. Running at: https://harbor.arpansahu.me
-
Using Sentry for logging and debugging. Running at: https://arpansahu.sentry.io
What is Python ?
Python is a high-level, general-purpose programming language. Its design philosophy emphasizes code readability with the
use of significant indentation. Python is dynamically typed and garbage-collected. It supports multiple programming
paradigms, including structured, object-oriented and functional programming.
What is Django ?
Django is a Python-based free and open-source web framework that follows the model-template-view architectural pattern.
What is Redis ?
Redis is an in-memory data structure project implementing a distributed, in-memory key-value database with optional durability.
The most common Redis use cases are session cache, full-page cache, queues, leader boards and counting, publish-subscribe, and much more. in this case, we will use Redis as a message broker.
What is Ajax?
Ajax is a set of web development techniques that uses various web technologies on the client-side to create asynchronous web applications. With Ajax, web applications can send and retrieve data from a server asynchronously without interfering with the display and behavior of the existing page.
What is Web Sockets ?
WebSocket is bidirectional, a full-duplex protocol that is used in the same scenario of client-server communication, unlike HTTP it starts from ws:// or wss://. It is a stateful protocol, which means the connection between client and server will keep alive until it is terminated by either party (client or server). After closing the connection by either of the client and server, the connection is terminated from both ends.
What is Channels?
Channels preserve the synchronous behavior of Django and add a layer of asynchronous protocols allowing users to write the views that are entirely synchronous, asynchronous, or a mixture of both. Channels basically allow the application to support “long-running connections”. It replaces Django’s default WSGI with its ASGI.
Tech Stack


Demo
Available at: https://great-chat.arpansahu.me
admin login details:--
email: admin@arpansahu.me
password: showmecode
Since this is a chat app you can test it truly if you have another user too.
extra user details:--
email: technorigger95@gmail.com
password: showmecode
License
MIT
Installation
Installing Pre requisites
pip install -r requirements.txt
Create .env File and don't forget to add .env to gitignore
add variables mentioned in .env.example
Making Migrations and Migrating them.
  python manage.py makemigrations
  python manage.py migrate
Run update_data Command
python manage.py update_data
Creating Super User
python manage.py createsuperuser
Running Necessary Management Commands
python manage.py create_chatgroup
Installing Redis On Local (For ubuntu) for other Os Please refer to their website https://redis.io/
  curl -fsSL https://packages.redis.io/gpg | sudo gpg --dearmor -o /usr/share/keyrings/redis-archive-keyring.gpg
  echo "deb [signed-by=/usr/share/keyrings/redis-archive-keyring.gpg] https://packages.redis.io/deb $(lsb_release -cs) main" | sudo tee /etc/apt/sources.list.d/redis.list
  sudo apt-get update
  sudo apt-get install redis
  sudo systemctl restart redis.service
to check if its running or not
sudo systemctl status redis
Run Server
  python manage.py runserver

  or

  daphne -b 0.0.0.0 -p 8002 great_chat.asgi:application
Change settings.py static files and media files settings | Now I have added support for BlackBlaze Static Storage also which also based on AWS S3 protocols
if not DEBUG:
    BUCKET_TYPE = BUCKET_TYPE

    if BUCKET_TYPE == 'AWS':
        AWS_S3_CUSTOM_DOMAIN = f'{AWS_STORAGE_BUCKET_NAME}.s3.amazonaws.com'
        AWS_DEFAULT_ACL = 'public-read'
        AWS_S3_OBJECT_PARAMETERS = {
            'CacheControl': 'max-age=86400'
        }
        AWS_LOCATION = 'static'
        AWS_QUERYSTRING_AUTH = False
        AWS_HEADERS = {
            'Access-Control-Allow-Origin': '*',
        }
        # s3 static settings
        AWS_STATIC_LOCATION = f'portfolio/{PROJECT_NAME}/static'
        STATIC_URL = f'https://{AWS_S3_CUSTOM_DOMAIN}/{AWS_STATIC_LOCATION}/'
        STATICFILES_STORAGE = f'{PROJECT_NAME}.storage_backends.StaticStorage'
        # s3 public media settings
        AWS_PUBLIC_MEDIA_LOCATION = f'portfolio/{PROJECT_NAME}/media'
        MEDIA_URL = f'https://{AWS_S3_CUSTOM_DOMAIN}/{AWS_PUBLIC_MEDIA_LOCATION}/'
        DEFAULT_FILE_STORAGE = f'{PROJECT_NAME}.storage_backends.PublicMediaStorage'
        # s3 private media settings
        PRIVATE_MEDIA_LOCATION = f'portfolio/{PROJECT_NAME}/private'
        PRIVATE_FILE_STORAGE = f'{PROJECT_NAME}.storage_backends.PrivateMediaStorage'

    elif BUCKET_TYPE == 'BLACKBLAZE':
        AWS_S3_REGION_NAME = 'us-east-005'

        AWS_S3_ENDPOINT = f's3.{AWS_S3_REGION_NAME}.backblazeb2.com'
        AWS_S3_ENDPOINT_URL = f'https://{AWS_S3_ENDPOINT}'

        AWS_DEFAULT_ACL = 'public-read'
        AWS_S3_OBJECT_PARAMETERS = {
            'CacheControl': 'max-age=86400',
        }

        AWS_LOCATION = 'static'
        AWS_QUERYSTRING_AUTH = False
        AWS_HEADERS = {
            'Access-Control-Allow-Origin': '*',
        }
        # s3 static settings
        AWS_STATIC_LOCATION = f'portfolio/{PROJECT_NAME}/static'
        STATIC_URL = f'https://{AWS_STORAGE_BUCKET_NAME}.{AWS_STATIC_LOCATION}/'
        STATICFILES_STORAGE = f'{PROJECT_NAME}.storage_backends.StaticStorage'
        # s3 public media settings
        AWS_PUBLIC_MEDIA_LOCATION = f'portfolio/{PROJECT_NAME}/media'
        MEDIA_URL = f'https://{AWS_STORAGE_BUCKET_NAME}.{AWS_PUBLIC_MEDIA_LOCATION}/'
        DEFAULT_FILE_STORAGE = f'{PROJECT_NAME}.storage_backends.PublicMediaStorage'
        # s3 private media settings
        PRIVATE_MEDIA_LOCATION = f'portfolio/{PROJECT_NAME}/private'
        PRIVATE_FILE_STORAGE = f'{PROJECT_NAME}.storage_backends.PrivateMediaStorage'

    elif BUCKET_TYPE == 'MINIO':
        AWS_S3_REGION_NAME = 'us-east-1'  # MinIO doesn't require this, but boto3 does
        AWS_S3_ENDPOINT_URL = 'https://minio.arpansahu.me'
        AWS_DEFAULT_ACL = 'public-read'
        AWS_S3_OBJECT_PARAMETERS = {
            'CacheControl': 'max-age=86400',
        }
        AWS_LOCATION = 'static'
        AWS_QUERYSTRING_AUTH = False
        AWS_HEADERS = {
            'Access-Control-Allow-Origin': '*',
        }

        # s3 static settings
        AWS_STATIC_LOCATION = f'portfolio/{PROJECT_NAME}/static'
        STATIC_URL = f'https://{AWS_STORAGE_BUCKET_NAME}/{AWS_STATIC_LOCATION}/'
        STATICFILES_STORAGE = f'{PROJECT_NAME}.storage_backends.StaticStorage'

        # s3 public media settings
        AWS_PUBLIC_MEDIA_LOCATION = f'portfolio/{PROJECT_NAME}/media'
        MEDIA_URL = f'https://{AWS_STORAGE_BUCKET_NAME}/{AWS_PUBLIC_MEDIA_LOCATION}/'
        DEFAULT_FILE_STORAGE = f'{PROJECT_NAME}.storage_backends.PublicMediaStorage'

        # s3 private media settings
        PRIVATE_MEDIA_LOCATION = 'portfolio/borcelle_crm/private'
        PRIVATE_FILE_STORAGE = 'borcelle_crm.storage_backends.PrivateMediaStorage'
else:
    # Static files (CSS, JavaScript, Images)
    # https://docs.djangoproject.com/en/3.2/howto/static-files/

    STATIC_URL = '/static/'

    STATIC_ROOT = os.path.join(BASE_DIR, 'staticfiles')
    MEDIA_URL = '/media/'

MEDIA_ROOT = os.path.join(BASE_DIR, 'media')
STATICFILES_DIRS = [os.path.join(BASE_DIR, "static"), ]
run below command
python manage.py collectstatic
and you are good to go
Use these CACHE settings
CACHES = {
    'default': {
        'BACKEND': 'django_redis.cache.RedisCache',
        'LOCATION': REDIS_CLOUD_URL,
        'OPTIONS': {
            'CLIENT_CLASS': 'django_redis.client.DefaultClient',
        },
        'KEY_PREFIX': PROJECT_NAME
    }
}
Use these Channels Settings
CHANNEL_LAYERS = {
    'default': {
        # This example is assuming you use redis, in which case `channels_redis` is another dependency.
        'BACKEND': 'channels_redis.core.RedisChannelLayer',
        'CONFIG': {
            "hosts": [REDIS_CLOUD_URL],
        },
    },
}
Use these Sentry Settings for Logging
def get_git_commit_hash():
    try:
        return subprocess.check_output(['git', 'rev-parse', 'HEAD']).decode('utf-8').strip()
    except Exception:
        return None

sentry_sdk.init(
    dsn=SENTRY_DSH_URL,
    integrations=[
            DjangoIntegration(
                transaction_style='url',
                middleware_spans=True,
                # signals_spans=True,
                # signals_denylist=[
                #     django.db.models.signals.pre_init,
                #     django.db.models.signals.post_init,
                # ],
                # cache_spans=False,
            ),
        ],
    traces_sample_rate=1.0,  # Adjust this according to your needs
    send_default_pii=True,  # To capture personal identifiable information (optional)
    release=get_git_commit_hash(),  # Set the release to the current git commit hash
    environment=SENTRY_ENVIRONMENT,  # Or "staging", "development", etc.
    # profiles_sample_rate=1.0,
)

LOGGING = {
    'version': 1,
    'disable_existing_loggers': False,
    'handlers': {
        'console': {
            'level': 'DEBUG',
            'class': 'logging.StreamHandler',
        },
        'sentry': {
            'level': 'ERROR',  # Change this to WARNING or INFO if needed
            'class': 'sentry_sdk.integrations.logging.EventHandler',
            'formatter': 'verbose',
        },
    },
    'loggers': {
        'django': {
            'handlers': ['console', 'sentry'],
            'level': 'INFO',
            'propagate': False,
        },
        'django.request': {
            'handlers': ['console', 'sentry'],
            'level': 'ERROR',  # Only log errors to Sentry
            'propagate': False,
        },
        'django.db.backends': {
            'handlers': ['console', 'sentry'],
            'level': 'ERROR',  # Only log errors to Sentry
            'propagate': False,
        },
        'django.security': {
            'handlers': ['console', 'sentry'],
            'level': 'WARNING',  # You can set this to INFO or DEBUG as needed
            'propagate': False,
        },
        # You can add more loggers here if needed
    },
    'formatters': {
        'verbose': {
            'format': '%(levelname)s %(asctime)s %(module)s %(process)d %(thread)d %(message)s'
        },
    },
}
Also for setting up relays include Loader Script in base.html
<script src="https://js.sentry-cdn.com/{random_unique_code_get_from_sentry_ui}.min.js" crossorigin="anonymous"></script>
Custom Django Management Commands
-
Test DB
Django management command designed to test the basic functionality of the database. It performs a series of CRUD (Create, Read, Update, Delete) operations to ensure the database is working correctly.
python manage.py test_db
-
Test Cache
Django management command designed to test the basic functionality of the caching system. It performs a set and get operation to ensure the cache is working correctly and validates the expiration of cache entries.
python manage.py test_cache
-
Test Channels
Django management command designed to test the functionality of Django Channels, ensuring that it is properly configured and operational.
python manage.py test_channels
-
Sync Media to S3
In case if you are using production database and debug mode is on. all the media send in the chats will be stored to local media folder which might not get synced to s3 bucket and when you run in production those media will be missing.
python manage.py sync_media_to_s3
Readme Manager
Each repository contains an
update_readme.sh
script located in the
readme_manager
directory. This script is responsible for updating the README file in the repository by pulling in content from various sources.
What it Does
The
update_readme.sh
script performs the following actions:
-
Clone Required Files
: Clones the
requirements.txt
,
readme_updater.py
, and
baseREADME.md
files from the
common_readme
repository.
-
Set Up Python Environment
: Creates and activates a Python virtual environment.
-
Install Dependencies
: Installs the necessary dependencies listed in
requirements.txt
.
-
Run Update Script
: Executes the
readme_updater.py
script to update the README file using
baseREADME.md
and other specified sources.
-
Clean Up
: Deactivates the Python virtual environment and removes it.
How to Use
To run the
update_readme.sh
script, navigate to the
readme_manager
directory and execute the script:
cd readme_manager && ./update_readme.sh
This will update the
README.md
file in the root of the repository with the latest content from the specified sources.
Updating Content
If you need to make changes that are specific to the project or project-specific files, you might need to update the content of the partial README files. Here are the files that are included:
These files are specific to the project and should be updated within the project repository.
-
Common Files
:
-
All other files are common across projects and should be updated in the
common_readme
repository.
There are a few files which are common for all projects. For convenience, these are inside the
common_readme
repository so that if changes are made, they will be updated in all the projects' README files.
# Define a dictionary with the placeholders and their corresponding GitHub raw URLs or local paths

include_files = {
    # common files

    "README of Docker Installation": "https://raw.githubusercontent.com/arpansahu/common_readme/main/Docker%20Readme/docker_installation.md",
    "DOCKER_END": "https://raw.githubusercontent.com/arpansahu/common_readme/main/Docker%20Readme/docker_end.md",
    "README of Nginx Setup": "https://raw.githubusercontent.com/arpansahu/common_readme/main/AWS%20Deployment/nginx.md",
    "README of Nginx HTTPS Setup": "https://raw.githubusercontent.com/arpansahu/common_readme/main/AWS%20Deployment/nginx_https.md",
    "README of Jenkins Setup": "https://raw.githubusercontent.com/arpansahu/common_readme/main/AWS%20Deployment/Jenkins/Jenkins.md",
    "JENKINS_END": "https://raw.githubusercontent.com/arpansahu/common_readme/main/AWS%20Deployment/Jenkins/jenkins_end.md",
    "README of PostgreSql Server With Nginx Setup": "https://raw.githubusercontent.com/arpansahu/common_readme/main/AWS%20Deployment/Postgres.md",
    "README of PGAdmin4 Server With Nginx Setup": "https://raw.githubusercontent.com/arpansahu/common_readme/main/AWS%20Deployment/Pgadmin.md",
    "README of Portainer Server With Nginx Setup": "https://raw.githubusercontent.com/arpansahu/common_readme/main/AWS%20Deployment/Portainer.md",
    "README of Redis Server Setup": "https://raw.githubusercontent.com/arpansahu/common_readme/main/AWS%20Deployment/Redis.md",
    "README of Redis Commander Setup": "https://raw.githubusercontent.com/arpansahu/common_readme/main/AWS%20Deployment/RedisComander.md",
    "README of Minio Server Setup": "https://raw.githubusercontent.com/arpansahu/common_readme/main/AWS%20Deployment/Minio.md",
    "README of RabbitMQ Server Setup": "https://raw.githubusercontent.com/arpansahu/common_readme/main/AWS%20Deployment/Rabbitmq.md",
    "README of Intro": "https://raw.githubusercontent.com/arpansahu/common_readme/main/AWS%20Deployment/Intro.md",
    "README of Readme Manager": "https://raw.githubusercontent.com/arpansahu/common_readme/main/Readme%20manager/readme_manager.md",
    "AWS DEPLOYMENT INTRODUCTION": "https://raw.githubusercontent.com/arpansahu/common_readme/main/Introduction/aws_desployment_introduction.md",
    "STATIC_FILES": "https://raw.githubusercontent.com/arpansahu/common_readme/main/Introduction/static_files_settings.md",
    "SENTRY": "https://raw.githubusercontent.com/arpansahu/common_readme/main/Introduction/sentry.md",
    "CHANNELS": "https://raw.githubusercontent.com/arpansahu/common_readme/main/Introduction/channels.md",
    "CACHE": "https://raw.githubusercontent.com/arpansahu/common_readme/main/Introduction/cache.md",
    "README of Harbor" : "https://raw.githubusercontent.com/arpansahu/common_readme/main/AWS%20Deployment/harbor/harbor.md",
    "HARBOR DOCKER COMPOSE": "https://raw.githubusercontent.com/arpansahu/common_readme/main/AWS%20Deployment/harbor/docker-compose.md",
    "INCLUDE FILES": "https://raw.githubusercontent.com/arpansahu/common_readme/main/include_files.py",
    "MONITORING": "https://raw.githubusercontent.com/arpansahu/arpansahu-one-scripts/main/README.md?token=GHSAT0AAAAAACTHOPGXTRCHN6GJQNHQ43QKZUKVMPA",

    #kubernetes with kind
    # "KIND CONFIG MD": "https://raw.githubusercontent.com/arpansahu/common_readme/main/AWS%20Deployment/kubernetes/yaml_md_files/kind-config.md",
    # "KUBELET CONFIG MD": "https://raw.githubusercontent.com/arpansahu/common_readme/main/AWS%20Deployment/kubernetes/yaml_md_files/kubelet-config.md",
    # "DASHBOARD ADMIN USER MD": "https://raw.githubusercontent.com/arpansahu/common_readme/main/AWS%20Deployment/kubernetes/yaml_md_files/dashboard-adminuser.md",
    # "DASHBOARD ADMIN USER ROLE BIND MD": "https://raw.githubusercontent.com/arpansahu/common_readme/main/AWS%20Deployment/kubernetes/yaml_md_files/dashboard-adminuser-rolebinding.md",
    # "DASHBOARD SERVICE": "https://raw.githubusercontent.com/arpansahu/common_readme/main/AWS%20Deployment/kubernetes/yaml_md_files/dashbord-service.md",
    # "DASHBOARD ADMIN SA MD": "https://raw.githubusercontent.com/arpansahu/common_readme/main/AWS%20Deployment/kubernetes/yaml_md_files/dashboard-admin-sa.md",
    # "DASHBOARD ADMIN SA BINDING": "https://raw.githubusercontent.com/arpansahu/common_readme/main/AWS%20Deployment/kubernetes/yaml_md_files/dashboard-admin-sa-binding.md",
    # "DASHBOARD ADMIN SA SECRET": "https://raw.githubusercontent.com/arpansahu/common_readme/main/AWS%20Deployment/kubernetes/yaml_md_files/dashboard-admin-sa-secret.md",
    # "KUBE WITH DASHBOARD" : "https://raw.githubusercontent.com/arpansahu/common_readme/main/AWS%20Deployment/kubernetes/kube_with_dashboard.md",
    # "KUBE DEPLOYMENT": "https://raw.githubusercontent.com/arpansahu/common_readme/main/AWS%20Deployment/kubernetes/deployment.md",

    # kubernetes with rancher
    "KUBE WITH DASHBOARD" : "https://raw.githubusercontent.com/arpansahu/common_readme/main/AWS%20Deployment/kubernetes_with_rancher/kube_with_dashboard.md",
    "KUBE DEPLOYMENT": "https://raw.githubusercontent.com/arpansahu/common_readme/main/AWS%20Deployment/kubernetes_with_rancher/deployment.md",

    # project files
    "env.example": "../env.example",
    "docker-compose.yml": "../docker-compose.yml",
    "Dockerfile": "../Dockerfile",
    "Jenkinsfile-deploy": "../Jenkinsfile-deploy",
    "Jenkinsfile-build": "../Jenkinsfile-build",
    "DEPLOYMENT YAML": "../deployment.yaml",
    "SERVICE YAML": "../service.yaml",


    # project partials files
    "INTRODUCTION": "../readme_manager/partials/introduction.md",
    "INTRODUCTION MAIN": "../readme_manager/partials/introduction_main.md",
    "DOC_AND_STACK": "../readme_manager/partials/documentation_and_stack.md",
    "TECHNOLOGY QNA": "../readme_manager/partials/technology_qna.md",
    "DEMO": "../readme_manager/partials/demo.md",
    "INSTALLATION": "../readme_manager/partials/installation.md",
    "DJANGO_COMMANDS": "../readme_manager/partials/django_commands.md",
    "NGINX_SERVER": "../readme_manager/partials/nginx_server.md",
    "SERVICES": "../readme_manager/partials/services.md",
    "JENKINS PROJECT NAME": "../readme_manager/partials/jenkins_project_name.md",
    "JENKINS BUILD PROJECT NAME": "../readme_manager/partials/jenkins_build_project_name.md",
    "STATIC PROJECT NAME": "../readme_manager/partials/static_project_name.md",
    "PROJECT_NAME_DASH" : "../readme_manager/partials/project_name_with_dash.md",
    "PROJECT_DOCKER_PORT": "../readme_manager/partials/project_docker_port.md",
    "PROJECT_NODE_PORT": "../readme_manager/partials/project_node_port.md",
    "DOMAIN_NAME": "../readme_manager/partials/project_domain_name.md"
}
Also, remember if you want to include new files, you need to change the
baseREADME
file and the
include_files
array in the
common_readme
repository itself.
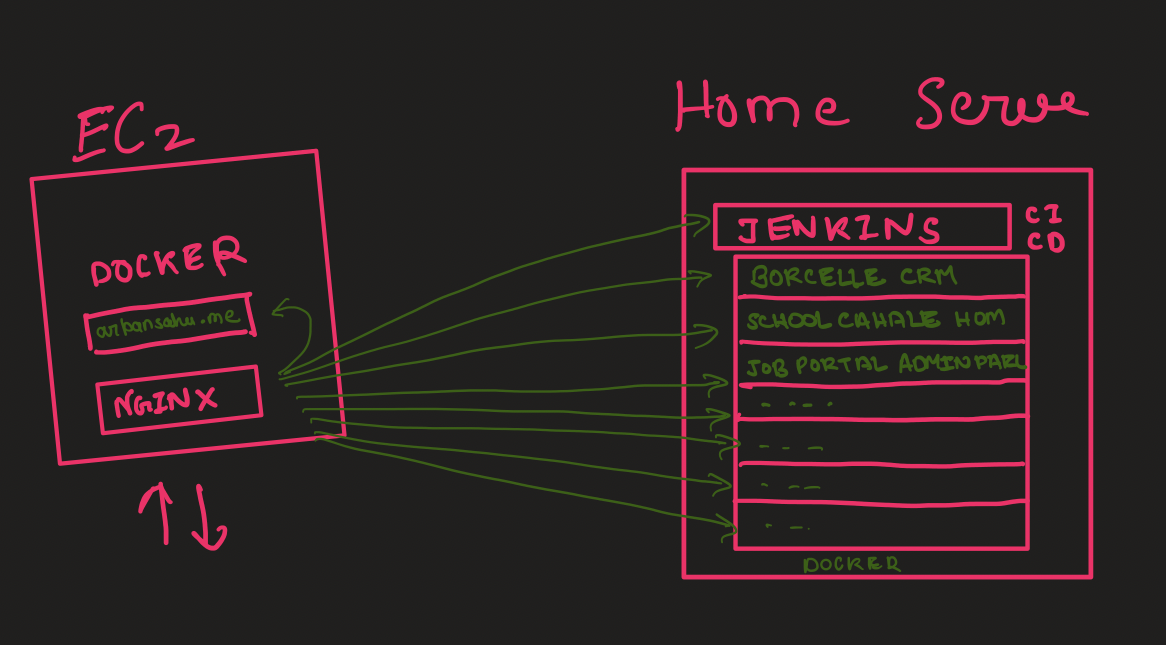
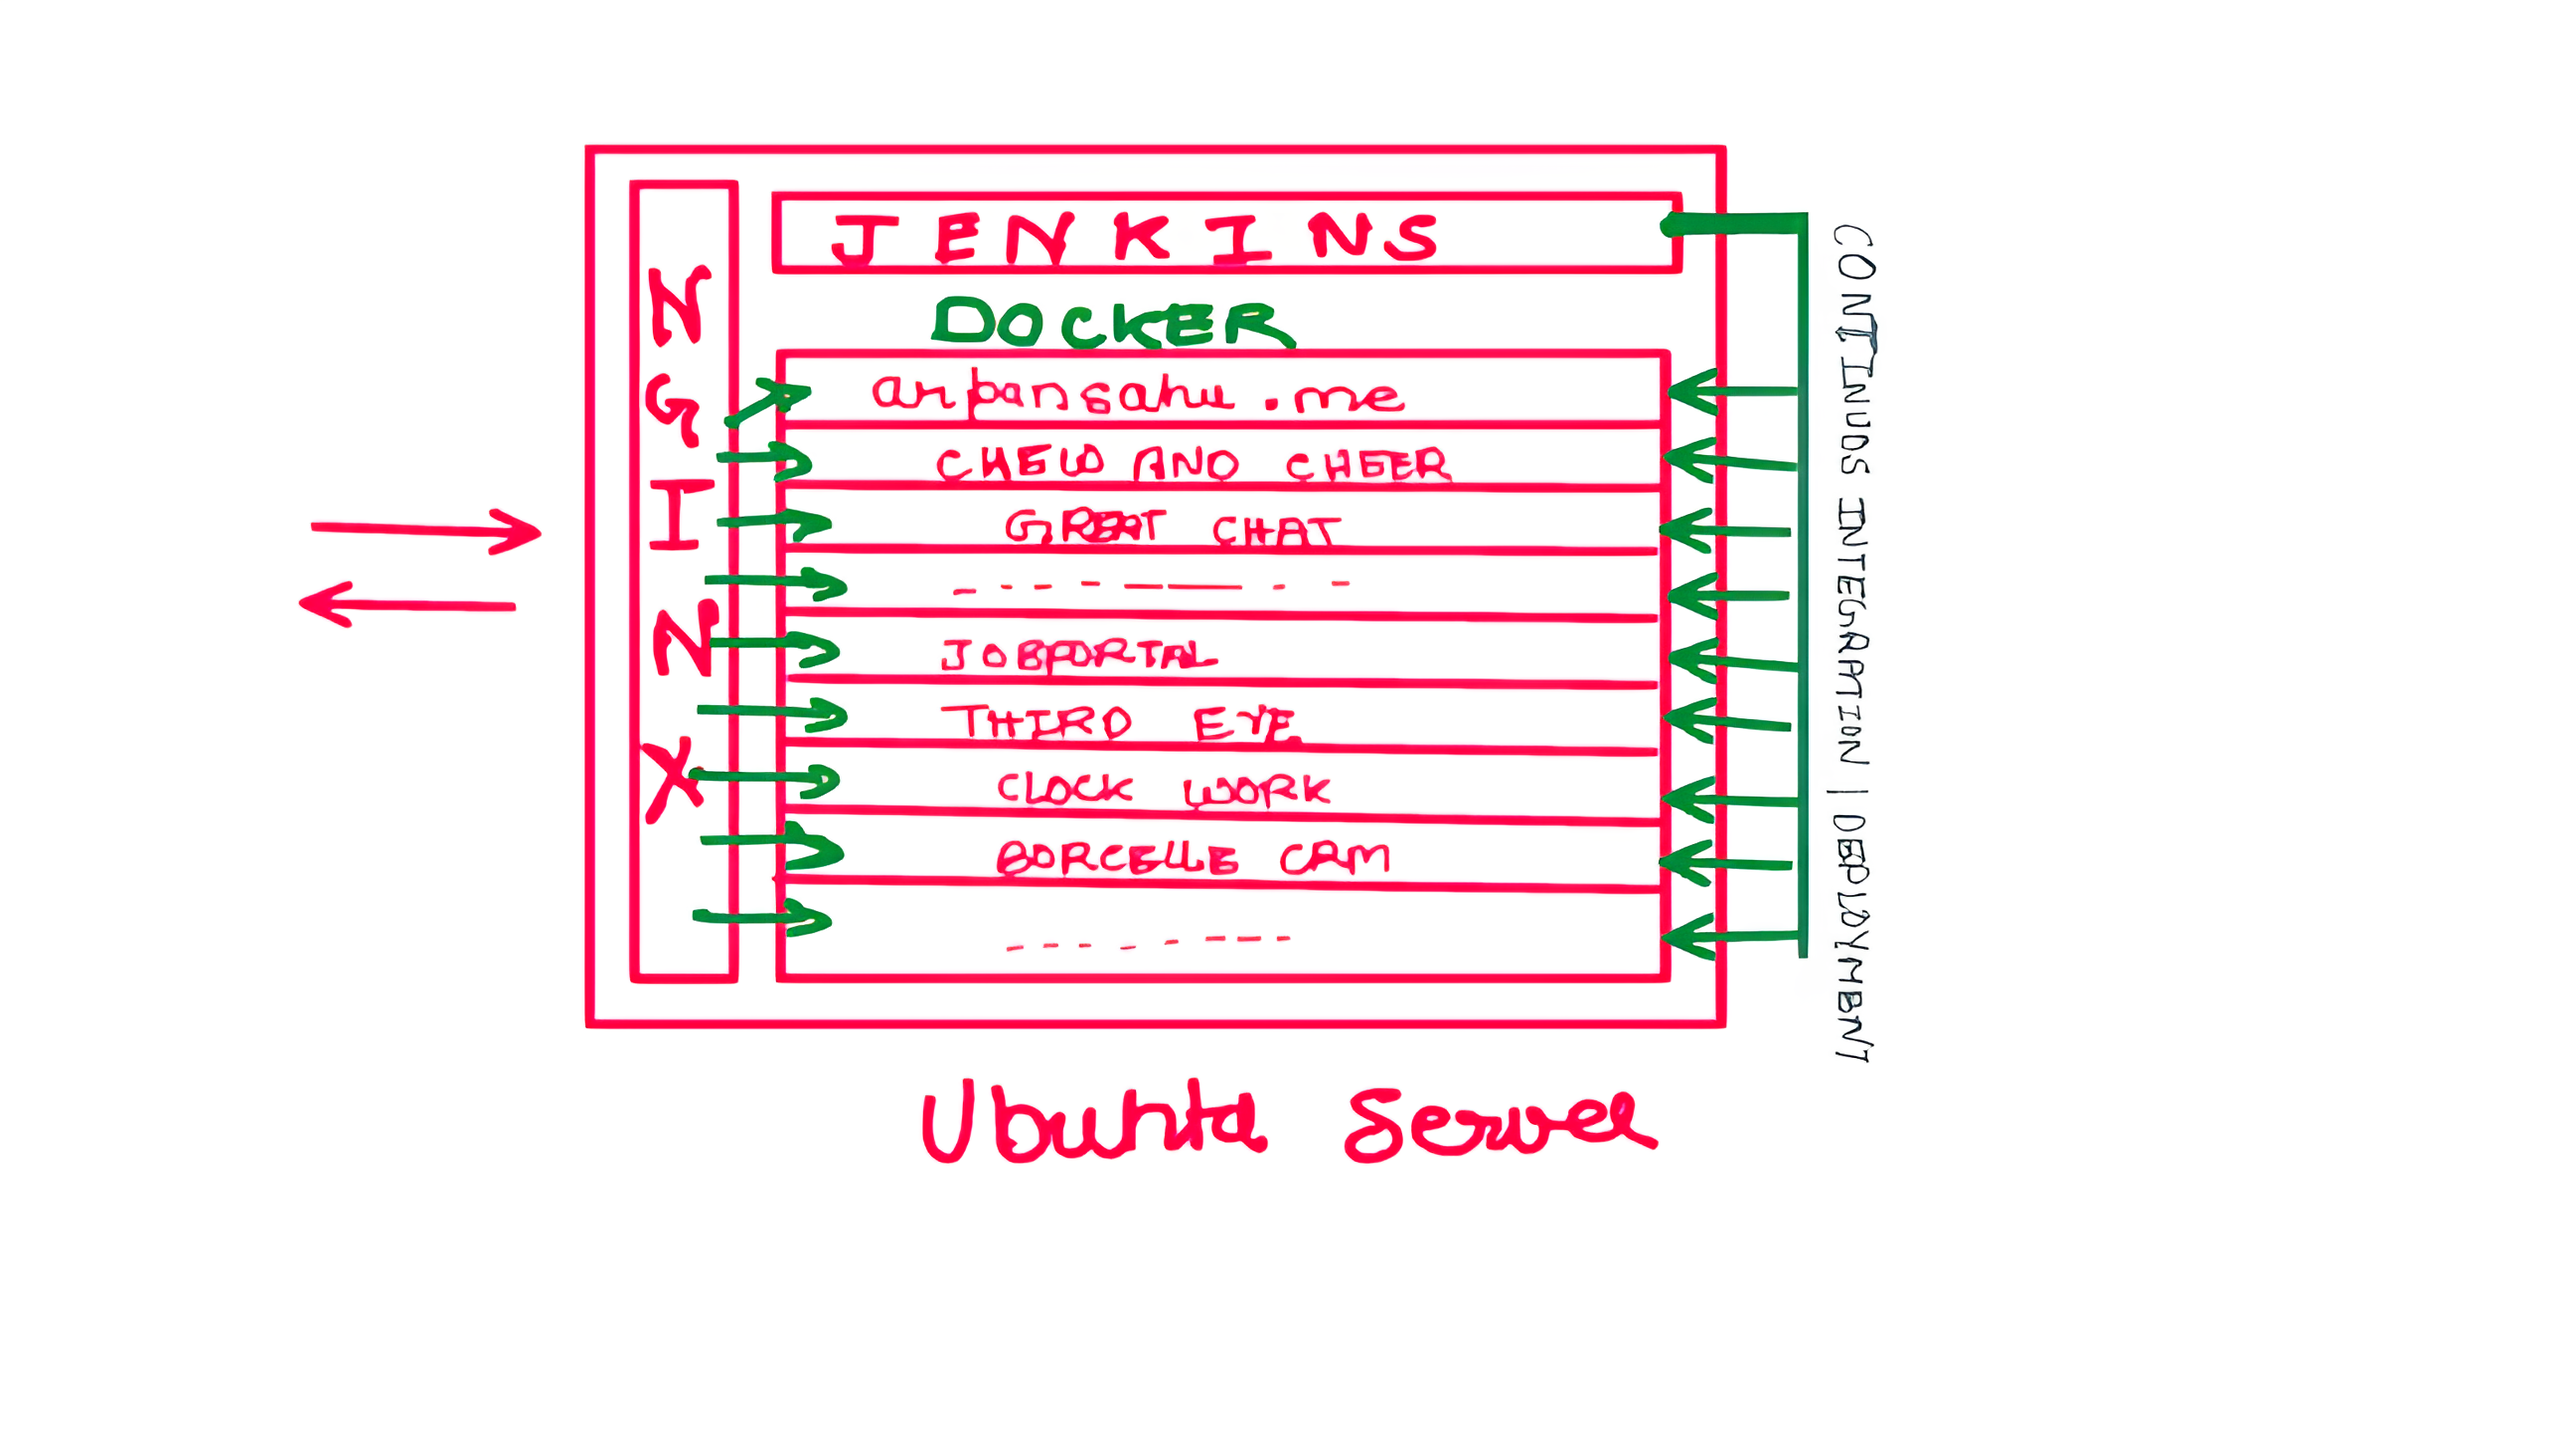
Deployment on AWS EC2/ Home Server Ubuntu 22.0 LTS/ Hostinger VPS Server
Previously This project was hosted on Heroku, but so I started hosting this and all other projects in a
Single EC2 Machine, which cost me a lot, so now I have shifted all the projects to my own Home Server with
Ubuntu 22.0 LTS Server, except for portfolio project at https://arpansahu.me along with Nginx
Now there is an EC2 server running with an nginx server and arpansahu.me portfolio
Nginx forwarded https://arpansahu.me/ to the Home Server
Multiple Projects are running inside dockers so all projects are dockerized.
You can refer to all projects at https://arpansahu.me/projects
Every project has a different port on which it runs predefined inside Dockerfile and docker-compose.yml
Note: Update as of Aug 2023, I have decided to make some changes to my lifestyle, and from now I will be constantly on the go
from my experience with running a free EC2 server for arpansahu. me and nginx in it and then using another home server
with all the other projects hosted, my experience was
-
Downtime due to Broadband Service Provider Issues
-
Downtime due to Weather Sometimes
-
Downtime due to Machine Breakdown
-
Downtime due to Power Cuts (even though I had an inverted battery setup for my room)
-
Remotely it would be harder to fix these problems
and due to all these reasons I decided to shift all the projects to a single EC2 Server, at first I was using t2.medium which costs more than 40$ a month
then I switched to t2.small and it only costs you 15$ if we take pre-paid plans prices can be slashed much further.
Then again I shifted to Hostinger VPS which was more cost-friendly than EC2 Server. On Jan 2024
Now My project arrangements look something similar to this
Step 1: Dockerize
Installing Redis Commander
Reference: https://docs.docker.com/engine/install/ubuntu/
-
Setting up the Repository
-
Update the apt package index and install packages to allow apt to use a repository over HTTPS:
       sudo apt-get update

       sudo apt-get install \
       ca-certificates \
       curl \
       gnupg \
       lsb-release
-
Add Docker’s official GPG key:
       sudo mkdir -p /etc/apt/keyrings

       curl -fsSL https://download.docker.com/linux/ubuntu/gpg | sudo gpg --dearmor -o /etc/apt/keyrings/docker.gpg
-
Use the following command to set up the repository:
       echo \
         "deb [arch=$(dpkg --print-architecture) signed-by=/etc/apt/keyrings/docker.gpg] https://download.docker.com/linux/ubuntu \
         $(lsb_release -cs) stable" | sudo tee /etc/apt/sources.list.d/docker.list > /dev/null
-
Install Docker Engine
-
Update the apt package index:
sudo apt-get update
  1. Receiving a GPG error when running apt-get update?

     Your default umask may be incorrectly configured, preventing detection of the repository public key file. Try granting read permission for the Docker public key file before updating the package index:
            sudo chmod a+r /etc/apt/keyrings/docker.gpg
            sudo apt-get update
-
Install Docker Engine, containerd, and Docker Compose.
sudo apt-get install docker-ce docker-ce-cli containerd.io docker-compose-plugin
-
Start Docker Engine
sudo systemctl start docker
4. Enable Docker Engine
sudo systemctl enable docker
5. Verify that the Docker Engine installation is successful by running the hello-world image:
sudo docker run hello-world
Now in your Git Repository
Create a file named Dockerfile with no extension and add following lines in it
Step 2: Private Docker Registry
Harbor (Self hosted Private Docker Registry)
Harbor is an open-source container image registry that secures images with role-based access control, scans images for vulnerabilities, and signs images as trusted. It extends the Docker Distribution by adding functionalities usually required by enterprise users, such as security, identity, and management.
Installing Harbor
-
Download Harbor:
Go to the Harbor releases page and download the latest offline installer tarball, e.g., harbor-offline-installer-
.tgz.
Alternatively, you can use wget to download it directly:
wget https://github.com/goharbor/harbor/releases/download/v2.4.2/harbor-offline-installer-v2.4.2.tgz
-
Extract the tarball:
    tar -zxvf harbor-offline-installer-v2.4.2.tgz
    cd harbor
-
Configure Harbor:
Note: I am having multiple projects running in single machine and 1 nginx is handling subdomains and domain arpansahu.me. Similarly i want my harbor to be accessible
from harbor.arpansahu.me.
-
Copy and edit the configuration file:
        cp harbor.yml.tmpl harbor.yml
        vi harbor.yml
2. Edit harbor.yml
        # Configuration file of Harbor

        # The IP address or hostname to access admin UI and registry service.
        # DO NOT use localhost or 127.0.0.1, because Harbor needs to be accessed by external clients.
        hostname: harbor.arpansahu.me

        # http related config
        http:
        # port for http, default is 80. If https enabled, this port will redirect to https port
        port: 8601
        # https related config
        https:
        # https port for harbor, default is 443
        port: 8602
        # The path of cert and key files for nginx
        certificate: /etc/letsencrypt/live/arpansahu.me/fullchain.pem
        private_key: /etc/letsencrypt/live/arpansahu.me/privkey.pem


        .......
        more lines
        .......
    There are almost 250 lines of code in this yml file but we have to make sure to edit this much configuration particularly
    default http port is 80 and https port is 443 since default harbor docker-compose.yml have nginx setup also. But we have our own nginx
    thats why we will change these both ports to available free port on the machine. I picked 8081 for http and 8443 for https. You can choose accordingly.


3. Edit docker-compose.yml

    Here docker-compose.yml file only be available after running the below install command
sudo ./install.sh --with-notary --with-trivy --with-chartmuseum
    Note: If docker compose is not available you need to install it

        1. Installing docker compose
sudo curl -L "https://github.com/docker/compose/releases/download/1.29.2/docker-compose-$(uname -s)-$(uname -m)" -o /usr/local/bin/docker-compose
2. Next, set the correct permissions so that the docker-compose command is executable:
sudo chmod +x /usr/local/bin/docker-compose
3. To verify that the installation was successful, you can run:
docker-compose --version
It might get success then you can see this file
vi docker-compose.yml
                version: '2.3'
        services:
        log:
            image: goharbor/harbor-log:v2.4.2
            container_name: harbor-log
            restart: always
            cap_drop:
            - ALL
            cap_add:
            - CHOWN
            - DAC_OVERRIDE
            - SETGID
            - SETUID
            volumes:
            - /var/log/harbor/:/var/log/docker/:z
            - type: bind
                source: ./common/config/log/logrotate.conf
                target: /etc/logrotate.d/logrotate.conf
            - type: bind
                source: ./common/config/log/rsyslog_docker.conf
                target: /etc/rsyslog.d/rsyslog_docker.conf
            ports:
            - 127.0.0.1:1514:10514
            networks:
            - harbor
        registry:
            image: goharbor/registry-photon:v2.4.2
            container_name: registry
            restart: always
            cap_drop:
            - ALL
            cap_add:
            - CHOWN
            - SETGID
            - SETUID
            volumes:
            - /data/registry:/storage:z
            - ./common/config/registry/:/etc/registry/:z
            - type: bind
                source: /data/secret/registry/root.crt
                target: /etc/registry/root.crt
            - type: bind
                source: ./common/config/shared/trust-certificates
                target: /harbor_cust_cert
            networks:
            - harbor
            depends_on:
            - log
            logging:
            driver: "syslog"
            options:
                syslog-address: "tcp://localhost:1514"
                tag: "registry"
        registryctl:
            image: goharbor/harbor-registryctl:v2.4.2
            container_name: registryctl
            env_file:
            - ./common/config/registryctl/env
            restart: always
            cap_drop:
            - ALL
            cap_add:
            - CHOWN
            - SETGID
            - SETUID
            volumes:
            - /data/registry:/storage:z
            - ./common/config/registry/:/etc/registry/:z
            - type: bind
                source: ./common/config/registryctl/config.yml
                target: /etc/registryctl/config.yml
            - type: bind
                source: ./common/config/shared/trust-certificates
                target: /harbor_cust_cert
            networks:
            - harbor
            depends_on:
            - log
            logging:
            driver: "syslog"
            options:
                syslog-address: "tcp://localhost:1514"
                tag: "registryctl"
        postgresql:
            image: goharbor/harbor-db:v2.4.2
            container_name: harbor-db
            restart: always
            cap_drop:
            - ALL
            cap_add:
            - CHOWN
            - DAC_OVERRIDE
            - SETGID
            - SETUID
            volumes:
            - /data/database:/var/lib/postgresql/data:z
            networks:
            harbor:
            harbor-notary:
                aliases:
                - harbor-db
            env_file:
            - ./common/config/db/env
            depends_on:
            - log
            logging:
            driver: "syslog"
            options:
                syslog-address: "tcp://localhost:1514"
                tag: "postgresql"
            shm_size: '1gb'
        core:
            image: goharbor/harbor-core:v2.4.2
            container_name: harbor-core
            env_file:
            - ./common/config/core/env
            restart: always
            cap_drop:
            - ALL
            cap_add:
            - SETGID
            - SETUID
            volumes:
            - /data/ca_download/:/etc/core/ca/:z
            - /data/:/data/:z
            - ./common/config/core/certificates/:/etc/core/certificates/:z
            - type: bind
                source: ./common/config/core/app.conf
                target: /etc/core/app.conf
            - type: bind
                source: /data/secret/core/private_key.pem
                target: /etc/core/private_key.pem
            - type: bind
                source: /data/secret/keys/secretkey
                target: /etc/core/key
            - type: bind
                source: ./common/config/shared/trust-certificates
                target: /harbor_cust_cert
            networks:
            harbor:
            harbor-notary:
            harbor-chartmuseum:
                aliases:
                - harbor-core
            depends_on:
            - log
            - registry
            - redis
            - postgresql
            logging:
            driver: "syslog"
            options:
                syslog-address: "tcp://localhost:1514"
                tag: "core"
        portal:
            image: goharbor/harbor-portal:v2.4.2
            container_name: harbor-portal
            restart: always
            cap_drop:
            - ALL
            cap_add:
            - CHOWN
            - SETGID
            - SETUID
            - NET_BIND_SERVICE
            volumes:
            - type: bind
                source: ./common/config/portal/nginx.conf
                target: /etc/nginx/nginx.conf
            networks:
            - harbor
            depends_on:
            - log
            logging:
            driver: "syslog"
            options:
                syslog-address: "tcp://localhost:1514"
                tag: "portal"
        jobservice:
            image: goharbor/harbor-jobservice:v2.4.2
            container_name: harbor-jobservice
            env_file:
            - ./common/config/jobservice/env
            restart: always
            cap_drop:
            - ALL
            cap_add:
            - CHOWN
            - SETGID
            - SETUID
            volumes:
            - /data/job_logs:/var/log/jobs:z
            - type: bind
                source: ./common/config/jobservice/config.yml
                target: /etc/jobservice/config.yml
            - type: bind
                source: ./common/config/shared/trust-certificates
                target: /harbor_cust_cert
            networks:
            - harbor
            depends_on:
            - core
            logging:
            driver: "syslog"
            options:
                syslog-address: "tcp://localhost:1514"
                tag: "jobservice"
        redis:
            image: goharbor/redis-photon:v2.4.2
            container_name: redis
            restart: always
            cap_drop:
            - ALL
            cap_add:
            - CHOWN
            - SETGID
            - SETUID
            volumes:
            - /data/redis:/var/lib/redis
            networks:
            harbor:
            harbor-chartmuseum:
                aliases:
                - redis
            depends_on:
            - log
            logging:
            driver: "syslog"
            options:
                syslog-address: "tcp://localhost:1514"
                tag: "redis"
        proxy:
            image: goharbor/nginx-photon:v2.4.2
            container_name: nginx
            restart: always
            cap_drop:
            - ALL
            cap_add:
            - CHOWN
            - SETGID
            - SETUID
            - NET_BIND_SERVICE
            volumes:
            - ./common/config/nginx:/etc/nginx:z
            - /data/secret/cert:/etc/cert:z
            - type: bind
                source: ./common/config/shared/trust-certificates
                target: /harbor_cust_cert
            networks:
            - harbor
            - harbor-notary
            ports:
            - 8601:8080
            - 8602:8443
            - 4443:4443
            depends_on:
            - registry
            - core
            - portal
            - log
            logging:
            driver: "syslog"
            options:
                syslog-address: "tcp://localhost:1514"
                tag: "proxy"
        notary-server:
            image: goharbor/notary-server-photon:v2.4.2
            container_name: notary-server
            restart: always
            networks:
            - notary-sig
            - harbor-notary
            volumes:
            - ./common/config/notary:/etc/notary:z
            - type: bind
                source: /data/secret/notary/notary-signer-ca
    As you can see the ports we used in harbor.yml are configured here and nginx service have been removed.
    ports:
      - 8601:8080
      - 8602:8443
      - 4443:4443
-
Run the Harbor install script:
sudo ./install.sh --with-notary --with-trivy --with-chartmuseum
-
Complete Setup:
Follow the on-screen instructions to complete the setup process. You may choose to deploy a local agent for better performance, but it's not required for basic functionality.
Once the setup is complete, you should have access to the Portainer dashboard, where you can manage and monitor your Docker containers, images, volumes, and networks through a user-friendly web interface.
Keep in mind that the instructions provided here assume a basic setup. For production environments, it's recommended to secure the Portainer instance, such as by using HTTPS and setting up authentication. Refer to the
Portainer documentation
for more advanced configurations and security considerations.
Configuring Nginx as Reverse proxy
-
Edit Nginx Configuration
sudo vi /etc/nginx/sites-available/services
if /etc/nginx/sites-available/services does not exists

    1. Create a new configuration file: Create a new file in the Nginx configuration directory. The location of this directory varies depending on your  operating system and Nginx installation, but it’s usually found at /etc/nginx/sites-available/.
            touch /etc/nginx/sites-available/services
            vi /etc/nginx/sites-available/services
-
Add this server configuration
    server {
        listen         80;
        server_name    harbor.arpansahu.me;
        # force https-redirects
        if ($scheme = http) {
            return 301 https://$server_name$request_uri;
            }

        location / {
            proxy_pass              https://127.0.0.1:8443;
            proxy_set_header        Host $host;
            proxy_set_header    X-Forwarded-Proto $scheme;
        }

        listen 443 ssl; # managed by Certbot
        ssl_certificate /etc/letsencrypt/live/arpansahu.me/fullchain.pem; # managed by Certbot
        ssl_certificate_key /etc/letsencrypt/live/arpansahu.me/privkey.pem; # managed by Certbot
        include /etc/letsencrypt/options-ssl-nginx.conf; # managed by Certbot
        ssl_dhparam /etc/letsencrypt/ssl-dhparams.pem; # managed by Certbot
    }
-
Test the Nginx Configuration
sudo nginx -t
-
Reload Nginx to apply the new configuration
sudo systemctl reload nginx
Access Harbor UI
Harbor UI can be accessed here : https://portainer.arpansahu.me/
Connecting Docker Registry
Login to Docker Registry
You can connect to my Docker Registry
docker login harbor.arpansahu.me
Pushing Image to Harbor Docker Registry
-
Tag Image
docker tag image_name harbor.arpansahu.me/library/image_name:latest
-
Push Image
docker push harbor.arpansahu.me/library/image_name:latest
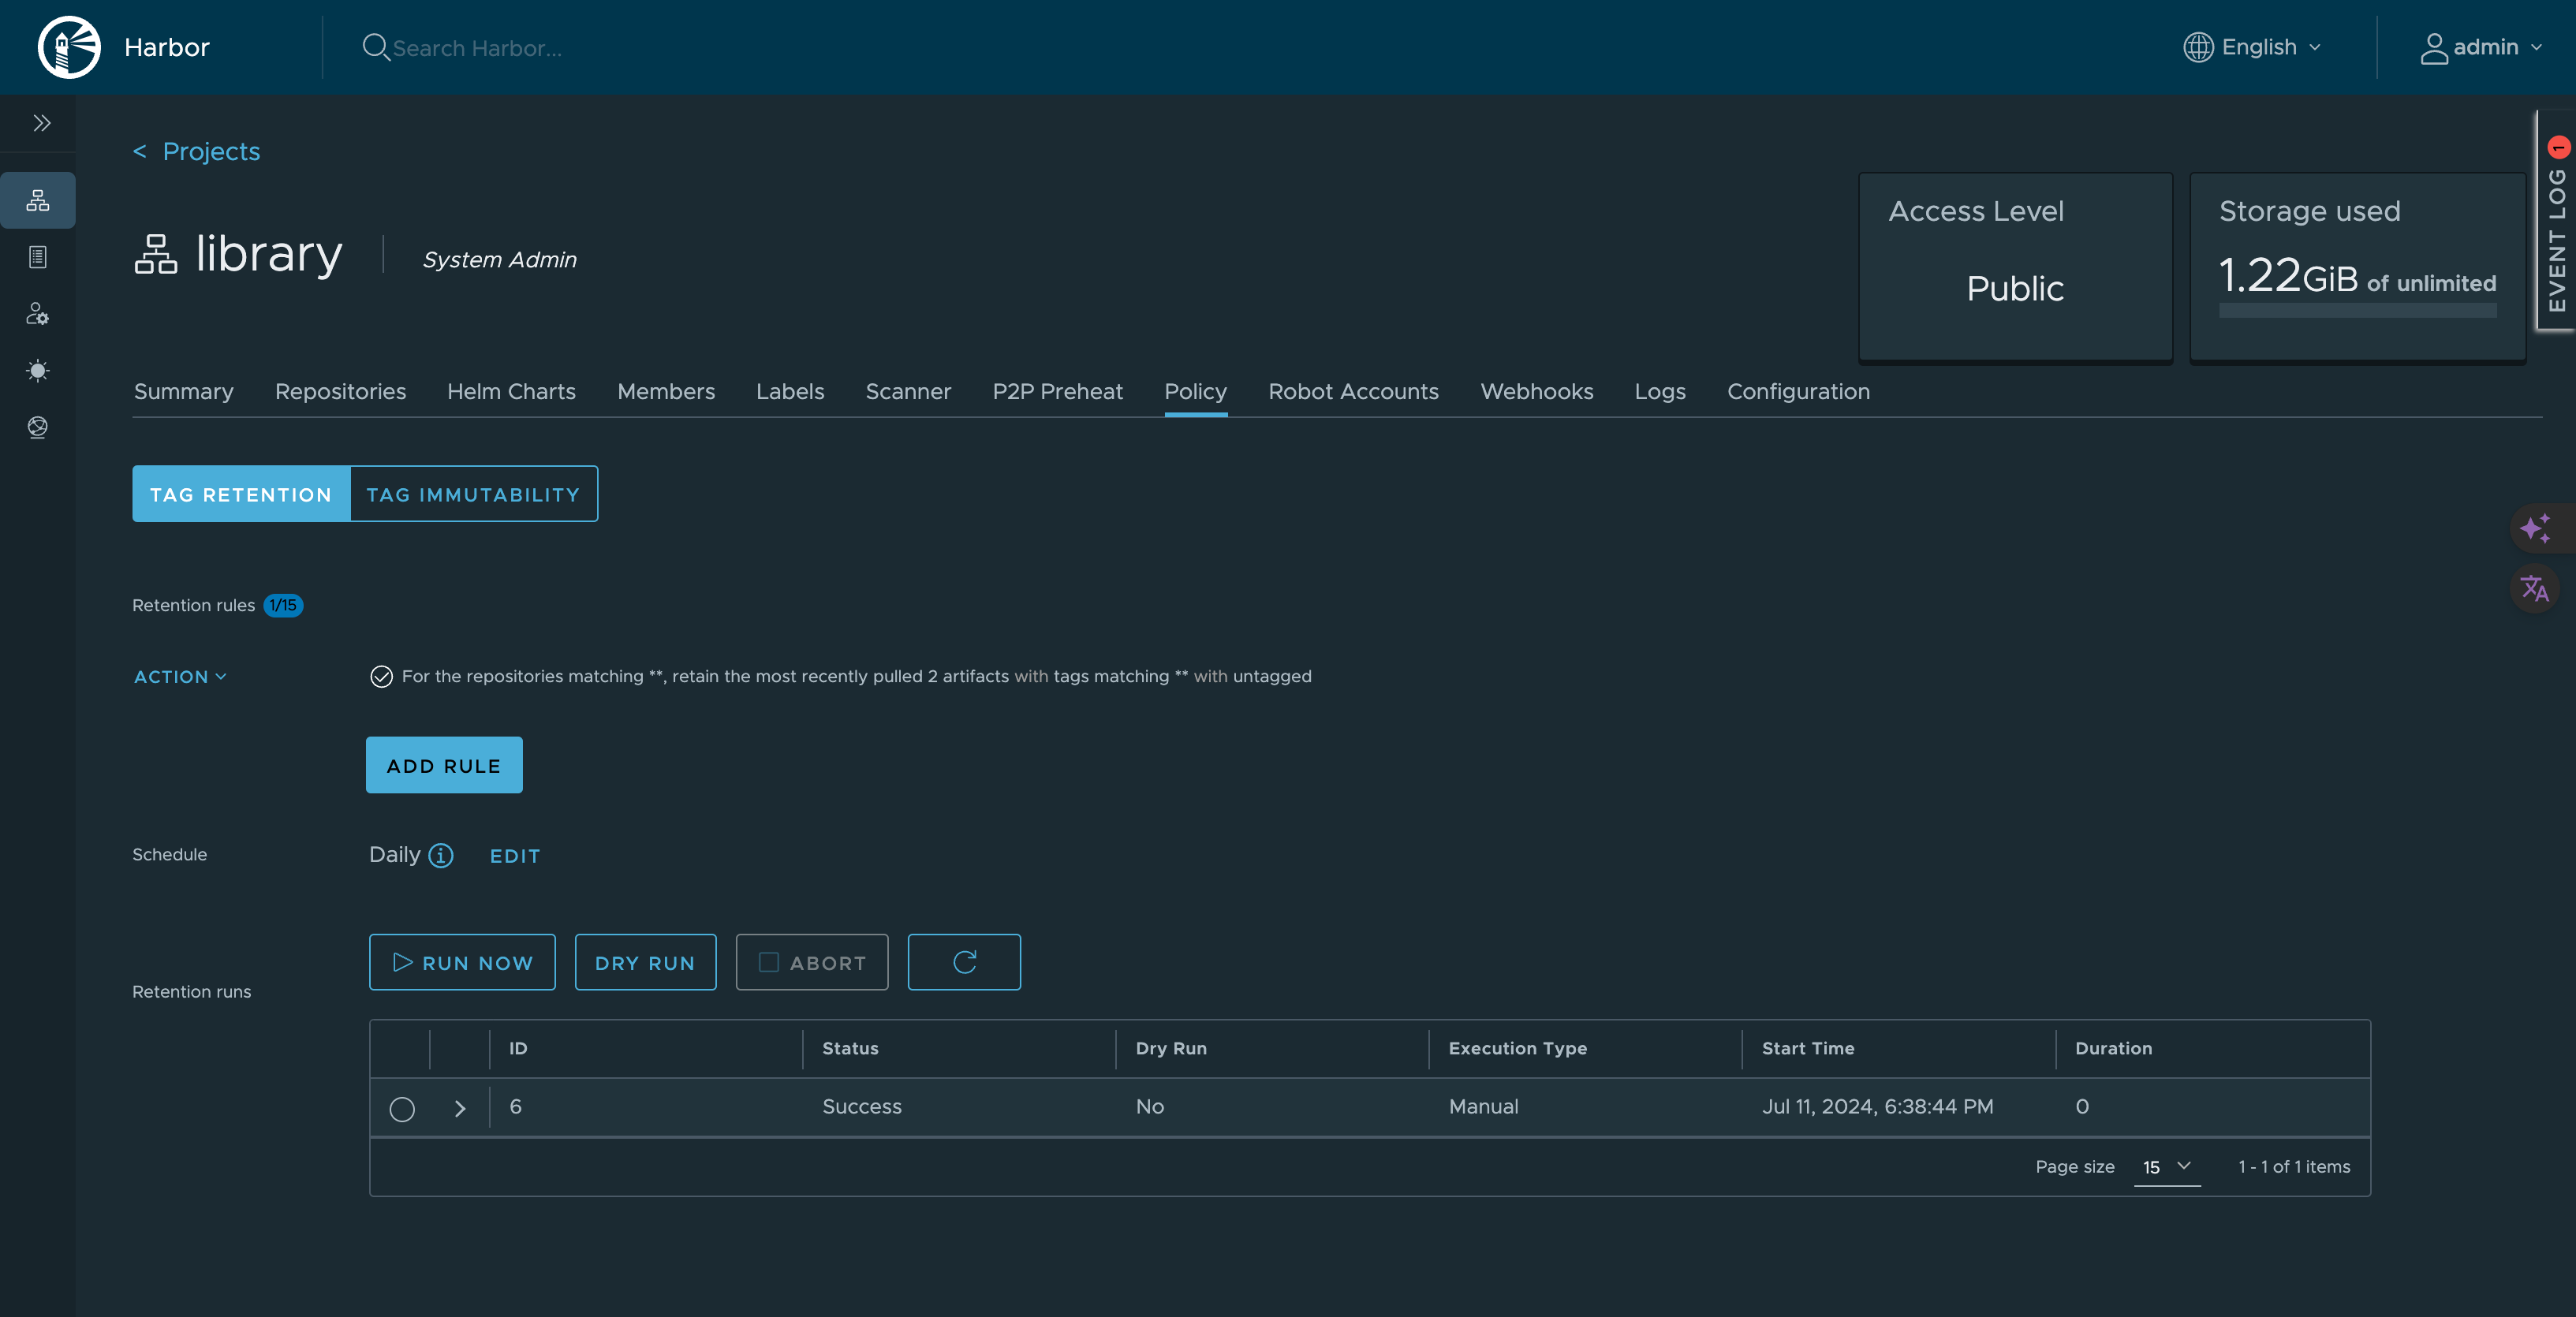
Create Image Retention Policy
Inside project, default project is library
Go to >>> Library project
Go to >>> Policy
Click on >>> Add Policy
For the repositories == matching **
By artifact count or number of days == retain the most recently pulled # artifacts Count = 2/3 no of last no of images
tags == matching Untagged artifacts = ticketed
This is one time task for entire project
Same as below
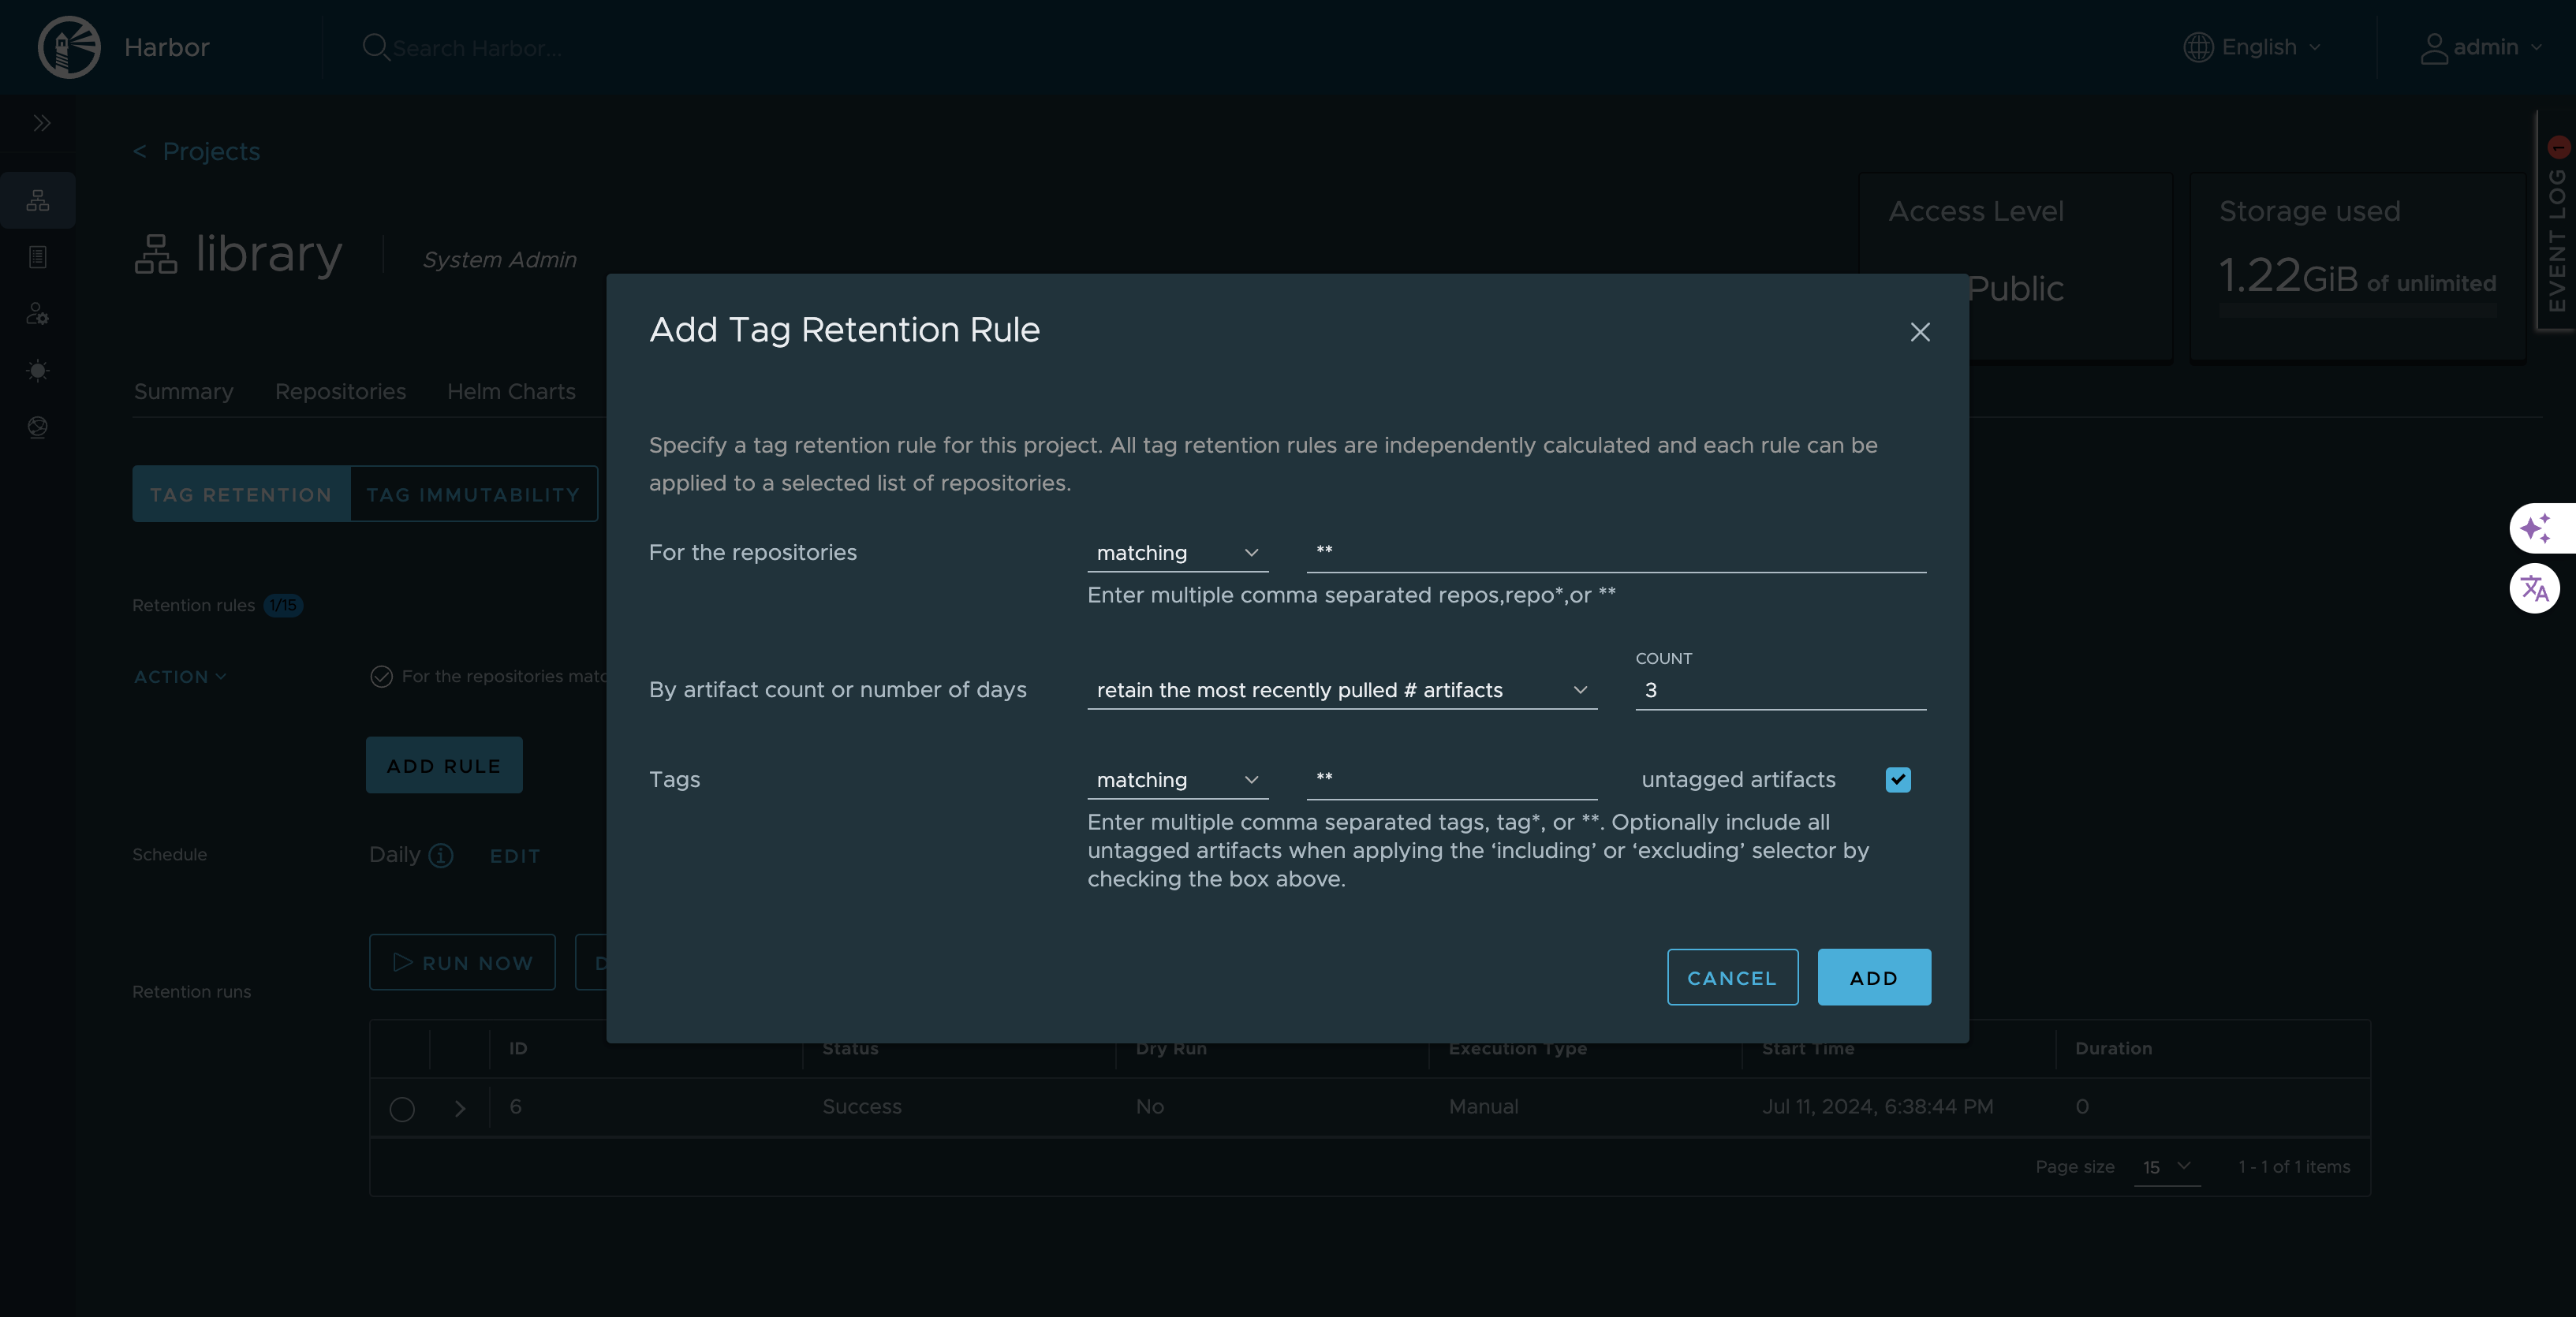
After adding rule schedule it as per requirement as below
FROM python:3.10.7

WORKDIR /app

COPY . .

RUN pip3 install -r requirements.txt

# Expose the application port
EXPOSE 8002

# Run collectstatic and daphne in a single command

CMD bash -c "python manage.py collectstatic --noinput && uvicorn great_chat.asgi:application --host 0.0.0.0 --port 8002"
Create a file named docker-compose.yml and add following lines in it
services:
  web:
    build:  # This section will be used when running locally
      context: .
      dockerfile: Dockerfile
    image: harbor.arpansahu.me/library/great_chat:latest  # This will be used when the image is not built locally
    env_file: ./.env
    command: bash -c "python manage.py makemigrations && python manage.py migrate && uvicorn great_chat.asgi:application --host 0.0.0.0 --port 8002"
    container_name: great_chat
    volumes:
      - .:/app  # Ensure this matches the WORKDIR in your Dockerfile
    ports:
      - "8002:8002"
    restart: unless-stopped
What is Difference in Dockerfile and docker-compose.yml?
A Dockerfile is a simple text file that contains the commands a user could call to assemble an image whereas Docker Compose is a tool for defining and running multi-container Docker applications.
Docker Compose define the services that make up your app in docker-compose.yml so they can be run together in an isolated environment. It gets an app running in one command by just running docker-compose up. Docker compose uses the Dockerfile if you add the build command to your project’s docker-compose.yml. Your Docker workflow should be to build a suitable Dockerfile for each image you wish to create, then use compose to assemble the images using the build command.
Running Docker
docker compose up --build --detach
--detach tag is for running the docker even if terminal is closed
if you remove this tag it will be attached to terminal, and you will be able to see the logs too
--build tag with docker compose up will force image to be rebuild every time before starting the container
Step 3: Containerizing with Kubernetes
Installing Kubernetes cluster and Setting A Dashboard
Install Kubernetes CLI (kubectl)
-
Install kubectl:
        curl -LO "https://dl.k8s.io/release/$(curl -L -s https://dl.k8s.io/release/stable.txt)/bin/linux/amd64/kubectl"
        chmod +x kubectl
        sudo mv kubectl /usr/local/bin/
Create a Rancher Cluster and Local Agent with Port Mappings in Docker
-
Run Below Docker Command:
        docker run -d --restart=unless-stopped \
            -p 9380:80 -p 9343:443 \
            -v /etc/letsencrypt/live/arpansahu.me/fullchain.pem:/etc/rancher/ssl/cert.pem \
            -v /etc/letsencrypt/live/arpansahu.me/privkey.pem:/etc/rancher/ssl/key.pem \
            --privileged \
            --name rancher \
            rancher/rancher:latest \
            --no-cacerts
Key points to note here: I already have lets encrypt generated certificates and they are automatically renewed too, so thats why,
we are using this example from their official documentation

This will deploy Rancher Dashboard with the specified ports
-
Create User Password via UI:
Go to public_ip:9343 or running in local use localhost/0.0.0.0:9343
it will give u a command similar to the below command
docker logs container-id 2>&1 | grep "Bootstrap Password:"
Run this command it will give you one time password
copy it and fill it in ui and then you will get option to set the password and username is admin (default)
-
Copy Kube Config from the dashboard
step 1: Click on home page
step 2: Click on local cluster
step 3: beside the profile photo you can see a download or copy kube config button
-
Edit Kube Config in you terminal
vi ~/.kube/config
Paste the copied content which will look something like this:
        apiVersion: v1
        kind: Config
        clusters:
        - name: "local"
        cluster:
            server: "https://rancher.arpansahu.me/k8s/clusters/local"

        users:
        - name: "local"
        user:
            token: "kubeconfig-user-gf9xx76krz:68b7z8xf86zb6pvjjdbv9hhqtd29p72tr2kp8n65n6qp24fpf5ss8l"


        contexts:
        - name: "local"
        context:
            user: "local"
            cluster: "local"

        current-context: "local"
Configure On-Premises Nginx as a Reverse Proxy
-
Edit Nginx Configuration
sudo vi /etc/nginx/sites-available/services
if /etc/nginx/sites-available/services does not exists

    1. Create a new configuration file: Create a new file in the Nginx configuration directory. The location of this directory varies depending on your  operating system and Nginx installation, but it’s usually found at /etc/nginx/sites-available/.
            touch /etc/nginx/sites-available/services
            vi /etc/nginx/sites-available/services
-
Add this server configuration
    # Map block to handle WebSocket upgrade
    map $http_upgrade $connection_upgrade {
        default upgrade;
        ''      close;
    }

    server {
        listen         80;
        server_name    rancher.arpansahu.me;

        # Redirect all HTTP traffic to HTTPS
        if ($scheme = http) {
            return 301 https://$server_name$request_uri;
        }

        location / {
            proxy_pass https://0.0.0.0:9343;
            proxy_set_header        Host $host;
            proxy_set_header    X-Forwarded-Proto $scheme;

            # WebSocket support
            proxy_http_version      1.1;
            proxy_set_header        Upgrade $http_upgrade;
            proxy_set_header        Connection $connection_upgrade;
        }

        # Disable HTTP/2 by ensuring http2 is not included in the listen directive
        listen 443 ssl; # managed by Certbot
        ssl_certificate           /etc/letsencrypt/live/arpansahu.me/fullchain.pem; # managed by Certbot
        ssl_certificate_key       /etc/letsencrypt/live/arpansahu.me/privkey.pem;   # managed by Certbot
        include                   /etc/letsencrypt/options-ssl-nginx.conf; # managed by Certbot
        ssl_dhparam               /etc/letsencrypt/ssl-dhparams.pem;       # managed by Certbot
    }
It is a key thing to note here since we are using External Nginx, it causes every request to upgrade to websocket when using
Rancher API through kubectl command so thats why we use below function
        # Map block to handle WebSocket upgrade
        map $http_upgrade $connection_upgrade {
            default upgrade;
            ''      close;
        }
Note: The purpose of this block is to prepare the Nginx configuration to handle WebSocket connections properly. When a client tries to initiate a WebSocket connection, it sends an Upgrade header. This block checks for that header and sets the $connection_upgrade variable to either upgrade (if a WebSocket upgrade is requested) or close (if it isn't).
-
Test the Nginx Configuration
sudo nginx -t
-
Reload Nginx to apply the new configuration
sudo systemctl reload nginx
Accessing
Access the Dashboard
https://rancher.arpansahu.me
you will be required to fill token for login
Access the cluster via Cli using kubectl
kubectl get nodes
Note:
Deployment
-
Create Harbor Secret
kubectl create secret docker-registry harbor-registry-secret \
  --docker-server=harbor.arpansahu.me \
  --docker-username=HARBOR_USERNAME \
  --docker-password=HARBOR_PASSWORD \
  --docker-email=YOUR_EMAIL_ID
-
Create deployment.yaml file and fill it with the below contents.
  apiVersion: apps/v1
kind: Deployment
metadata:
  name: great-chat-app
  labels:
    app: great-chat
spec:
  replicas: 1
  selector:
    matchLabels:
      app: great-chat
  template:
    metadata:
      labels:
        app: great-chat
    spec:
      imagePullSecrets:
        - name: harbor-registry-secret
      containers:
        - image: harbor.arpansahu.me/library/great_chat:latest
          name: great-chat
          envFrom:
            - secretRef:
                name: great-chat-secret
          ports:
            - containerPort: 8002
              name: daphne
  revisionHistoryLimit: 0
-
Create a service.yaml file and fill it with the below contents.
  apiVersion: v1
kind: Service
metadata:
  name: great-chat-service
spec:
  selector:
    app: great-chat
  ports:
    - protocol: TCP
      port: 8002
      targetPort: 8002
      nodePort: 32002
  type: NodePort
-
Create Env Secret for the project
kubectl create secret generic <SECRET_NAME> --from-env-file=/root/projectenvs/<PROJECT_NAME>/.env
Step 4: Serving the requests from Nginx
Installing the Nginx server
sudo apt-get install nginx
Starting Nginx and checking its status
sudo systemctl start nginx
sudo systemctl status nginx
Modify DNS Configurations
Add these two records to your DNS Configurations
A Record    *   0.227.49.244 (public IP of ec2) Automatic
A Record    @   0.227.49.244 (public IP of ec2) Automatic
Note: now you will be able to see nginx running page if you open the public IP of the machine
IP
Make Sure your EC2 security Group have these entry inbound rules
random-hash-id IPv4 HTTP TCP 80 0.0.0.0/0 –
Open a new Nginx Configuration file name can be anything i am choosing arpansahu since my domain is arpansahu.me. there is already a default configuration file but we will leave it like that only
touch /etc/nginx/sites-available/arpansahu
sudo vi /etc/nginx/sites-available/arpansahu
paste this content in the above file
server_tokens               off;
access_log                  /var/log/nginx/supersecure.access.log;
error_log                   /var/log/nginx/supersecure.error.log;


server {
    listen 80;
    server_name arpansahu.me www.arpansahu.me;
    location / {
        proxy_pass http://127.0.0.1:your_port_here;  # Adjust the proxy_pass or root if serving static files
        proxy_set_header Host $host;
        proxy_set_header X-Real-IP $remote_addr;
        proxy_set_header X-Forwarded-For $proxy_add_x_forwarded_for;
        proxy_set_header X-Forwarded-Proto $scheme;
    }
}
This single Nginx File will be hosting all the multiple projects which I have listed before also.
Checking if the configurations file is correct
sudo nginx -t
Now you need to symlink this file to the sites-enabled directory:
sudo ln -s /etc/nginx/sites-available/arpansahu /etc/nginx/sites-enabled/
Restarting Nginx Server
sudo systemctl restart nginx
Now it's time to enable HTTPS for this server
Step 5: Enabling HTTPS
-
Base Domain: Enabling HTTPS for base domain only or a single subdomain
To allow visitors to access your site over HTTPS, you’ll need an SSL/TLS certificate that sits on your web server. Certificates are issued by a Certificate Authority (CA). We’ll use a free CA called Let’s Encrypt. To install the certificate, you can use the Certbot client, which gives you an utterly painless step-by-step series of prompts.
Before starting with Certbot, you can tell Nginx up front to disable TLS versions 1.0 and 1.1 in favour of versions 1.2 and 1.3. TLS 1.0 is end-of-life (EOL), while TLS 1.1 contained several vulnerabilities that were fixed by TLS 1.2. To do this, open the file /etc/nginx/nginx.conf. Find the following line:
Open nginx.conf file end change ssl_protocols
    sudo vi /etc/nginx/nginx.conf

    From ssl_protocols TLSv1 TLSv1.1 TLSv1.2; to ssl_protocols TLSv1.2 TLSv1.3;
Use this command to verify if nginx.conf file is correct or not
sudo nginx -t
Now you’re ready to install and use Certbot, you can use Snap to install Certbot:
    sudo snap install --classic certbot
    sudo ln -s /snap/bin/certbot /usr/bin/certbot
Now installing certificate
sudo certbot --nginx --rsa-key-size 4096 --no-redirect -d arpansahu.me -d arpansahu.me
It will ask for the domain name then you can enter your base domain
I have generated SSL for arpansahu.me

Then a few questions will be asked answer them all and your SSL certificate will be generated

Now These lines will be added to your # Nginx configuration: /etc/nginx/sites-available/arpansahu
    listen 443 ssl; # managed by Certbot
    ssl_certificate /etc/letsencrypt/live/arpansahu.me/fullchain.pem; # managed by Certbot
    ssl_certificate_key /etc/letsencrypt/live/arpansahu.me/privkey.pem; # managed by Certbot
    include /etc/letsencrypt/options-ssl-nginx.conf; # managed by Certbot
    ssl_dhparam /etc/letsencrypt/ssl-dhparams.pem; # managed by Certbot
Redirecting HTTP to HTTPS
Open the nginx configuration file  and make it like this
sudo vi /etc/nginx/sites-available/arpansahu
    server_tokens               off;
    access_log                  /var/log/nginx/supersecure.access.log;
    error_log                   /var/log/nginx/supersecure.error.log;

    server {
      server_name               arpansahu.me;
      listen                    80;
      return                    307 https://$host$request_uri;
    }

    server {

      location / {
        proxy_pass              http://{ip_of_home_server/ localhost}:8000;
        proxy_set_header        Host $host;

        listen 443 ssl; # managed by Certbot
        ssl_certificate /etc/letsencrypt/live/arpansahu.me/fullchain.pem; # managed by Certbot
        ssl_certificate_key /etc/letsencrypt/live/arpansahu.me/privkey.pem; # managed by Certbot
        include /etc/letsencrypt/options-ssl-nginx.conf; # managed by Certbot
        ssl_dhparam /etc/letsencrypt/ssl-dhparams.pem; # managed by Certbot
    }
You can dry run and check whether it's renewal is working or not
sudo certbot renew --dry-run
Note: this process was for arpansahu.me and not for all subdomains.
For all subdomains, we will have to set a wildcard SSL certificate
-
Enabling a Wildcard certificate
Here we will enable an SSL certificate for all subdomains at once
Run the following Command
sudo certbot certonly --manual --preferred-challenges dns -d "*.arpansahu.me" -d "arpansahu.me"
Again you will be asked domain name and here you will use *.arpansahu.me. and second domain you will use is
arpansahu.me.

Now, you should have a question in your mind about why we are generating SSL for arpansahu.me separately.
It's because Let's Encrypt does not include a base domain with wildcard certificates for subdomains.

After running the above command you will see a message similar to this
    Saving debug log to /var/log/letsencrypt/letsencrypt.log
    Please enter the domain name(s) you would like on your certificate (comma and/or
    space separated) (Enter 'c' to cancel): *.arpansahu.me
    Requesting a certificate for *.arpansahu.me

    - - - - - - - - - - - - - - - - - - - - - - - - - - - - - - - - - - - - - - - -
    Please deploy a DNS TXT record under the name:

    _acme-challenge.arpansahu.me.

    with the following value:

    dpWCxvq3mARF5iGzSfaRNXwmdkUSs0wgsTPhSaX1gK4

    Before continuing, verify the TXT record has been deployed. Depending on the DNS
    provider, this may take some time, from a few seconds to multiple minutes. You can
    check if it has finished deploying with the aid of online tools, such as Google
    Admin Toolbox: https://toolbox.googleapps.com/apps/dig/#TXT/_acme-challenge.arpansahu.me.
    Look for one or more bolded line(s) below the line '; ANSWER'. It should show the
    value(s) you've just added.

    - - - - - - - - - - - - - - - - - - - - - - - - - - - - - - - - - - - - - - - -
    Press Enter to Continue
You will be given a DNS challenge called ACME challenger you have to create a DNS TXT record in DNS.
Similar to the below record.
TXT Record _acme-challenge dpWCxvq3mARF5iGzSfaRNXwmdkUSs0wgsTPhSaX1gK4 5 Automatic
Now, use this URL to verify whether records are updated or not

https://toolbox.googleapps.com/apps/dig/#TXT/_acme-challenge.arpansahu.me (arpansahu.me is domain)

If it's verified then press enter the terminal as mentioned above

Then your certificate will be generated
    Successfully received a certificate.
    The certificate is saved at: /etc/letsencrypt/live/arpansahu.me-0001/fullchain.pem            (use this in your nginx configuration file)
    Key is saved at:         /etc/letsencrypt/live/arpansahu.me-0001/privkey.pem
    This certificate expires on 2023-01-20.
    These files will be updated when the certificate is renewed.
You can notice here, the certificate generated is arpansahu.me-0001 and not arpansahu.me
because we already generated a certificate named arpansahu.me

So remember to delete it before generating this wildcard certificate
using command
sudo certbot delete
Note: This certificate will not be renewed automatically. Auto-renewal of --manual certificates requires the use of an authentication hook script (--manual-auth-hook) but one was not provided. To renew this certificate, repeat this same Certbot command before the certificate's expiry date.
-
Generating Wildcard SSL certificate and Automating its renewal
-
Modify your ec2 inbound rules
      – sgr-0219f1387d28c96fb   IPv4    DNS (TCP)   TCP 53  0.0.0.0/0   –
      – sgr-01b2b32c3cee53aa9   IPv4    SSH TCP 22  0.0.0.0/0   –
      – sgr-0dfd03bbcdf60a4f7   IPv4    HTTP    TCP 80  0.0.0.0/0   –
      – sgr-02668dff944b9b87f   IPv4    HTTPS   TCP 443 0.0.0.0/0   –
      – sgr-013f089a3f960913c   IPv4    DNS (UDP)   UDP 53  0.0.0.0/0   –
-
Install acme-dns Server
-
Create a folder for acme-dns and change the directory
         sudo mkdir /opt/acme-dns
         cd !$
* Download and extract tar with acme-dns from GitHub
        sudo curl -L -o acme-dns.tar.gz \
        https://github.com/joohoi/acme-dns/releases/download/v0.8/acme-dns_0.8_linux_amd64.tar.gz
        sudo tar -zxf acme-dns.tar.gz
* List files
sudo ls
* Clean Up
sudo rm acme-dns.tar.gz
* Create a soft link
        sudo ln -s \
        /opt/acme-dns/acme-dns /usr/local/bin/acme-dns
* Create a minimal acme-dns user
         sudo adduser \
         --system \
         --gecos "acme-dns Service" \
         --disabled-password \
         --group \
         --home /var/lib/acme-dns \
         acme-dns
* Update default acme-dns config compared with IP from the AWS console. Can't bind to the public address need to use private one.
        IP addr

        sudo mkdir -p /etc/acme-dns

        sudo mv /opt/acme-dns/config.cfg /etc/acme-dns/

        sudo vim /etc/acme-dns/config.cfg
* Replace
        listen = "127.0.0.1:53” to listen = “private IP of the ec2 instance” 172.31.93.180:53(port will be 53)

        Similarly, Edit other details mentioned below

        # domain name to serve the requests off of
        domain = "auth.arpansahu.me"
        # zone name server
        nsname = "auth.arpansahu.me"
        # admin email address, where @ is substituted with .
        nsadmin = "admin@arpansahu.me"


        records = [
          # domain pointing to the public IP of your acme-dns server
           "auth.arpansahu.me. A 44.199.177.138. (public elastic IP)”,
          # specify that auth.example.org will resolve any *.auth.example.org records
           "auth.arpansahu.me. NS auth.arpansahu.me.”,
        ]

        [api]
        # listen IP eg. 127.0.0.1
        IP = "127.0.0.1”. (Changed)

        # listen port, eg. 443 for default HTTPS
        port = "8080" (Changed).         ——— We will use port 8090 because we will also use Jenkins which will be running on 8080 port
        # possible values: "letsencrypt", "letsencryptstaging", "cert", "none"
        tls = "none"   (Changed)
* Move the systemd service and reload
        cat acme-dns.service

        sudo mv \
        acme-dns.service /etc/systemd/system/acme-dns.service

        sudo systemctl daemon-reload
* Start and enable acme-dns server
        sudo systemctl enable acme-dns.service
        sudo systemctl start acme-dns.service
* Check acme-dns for possible errors
sudo systemctl status acme-dns.service
* Use journalctl to debug in case of errors
journalctl --unit acme-dns --no-pager --follow
* Create A record for your domain
auth.arpansahu.me IN A <public-IP>
  * Create NS record for auth.arpansahu.me pointing to auth.arpansahu.me. This means, that auth.arpansahu.me is
    responsible for any *.auth.arpansahu.me records
auth.arpansahu.me IN NS auth.arpansahu.me
* Your DNS record will be looking like this
        A Record    auth    44.199.177.138  Automatic
        NS Record   auth    auth.arpansahu.me.  Automatic
* Test acme-dns server (Split the screen)
journalctl -u acme-dns --no-pager --follow
* From the local host try to resolve the random DNS record
        dig api.arpansahu.me
        dig api.auth.arpansahu.me
        dig 7gvhsbvf.auth.arpansahu.me
-
Install acme-dns-client
     sudo mkdir /opt/acme-dns-client
     cd !$

     sudo curl -L \
     -o acme-dns-client.tar.gz \
     https://github.com/acme-dns/acme-dns-client/releases/download/v0.2/acme-dns-client_0.2_linux_amd64.tar.gz

     sudo tar -zxf acme-dns-client.tar.gz
     ls
     sudo rm acme-dns-client.tar.gz
     sudo ln -s \
     /opt/acme-dns-client/acme-dns-client /usr/local/bin/acme-dns-client
-
Install Certbot
     cd
     sudo snap install core; sudo snap refresh core
     sudo snap install --classic certbot
     sudo ln -s /snap/bin/certbot /usr/bin/certbot
Note: you can skip this step if Certbot is already installed

5. Get Letsencrypt Wildcard Certificate
   * Create a new acme-dns account for your domain and set it up
         sudo acme-dns-client register \
         -d arpansahu.me -s http://localhost:8090
The above command is old now we will use the new command
         sudo acme-dns-client register \
          -d arpansahu.me \
          -allow 0.0.0.0/0 \
          -s http://localhost:8080
     Note: When we edited acme-dns config file there we mentioned the port 8090(now 8080) and thats why we are using this port here also

   * Creating Another DNS Entry
CNAME Record _acme-challenge e6ac0f0a-0358-46d6-a9d3-8dd41f44c7ec.auth.arpansahu.me. Automatic
Since the last update in the last step now two more entries should be added
         CAA Record @   0 issuewild "letsencrypt.org; validationmethods=dns-01; accounturi=https://acme-v02.api.letsencrypt.org/acme/acct/1424899626"  Automatic

         CAA Record @   0 issue "letsencrypt.org; validationmethods=dns-01; accounturi=https://acme-v02.api.letsencrypt.org/acme/acct/1424899626"
         Automatic
    Same as an entry that needs to be added to complete a time challenge as previously we did.
   * Check whether the entry is added successfully or not
dig _acme-challenge.arpansahu.me
* Get a wildcard certificate
         sudo certbot certonly \
         --manual \
         --test-cert \
         --preferred-challenges dns \
         --manual-auth-hook 'acme-dns-client' \
         -d ‘*.arpansahu.me’ -d arpansahu.me
    Note: Here we have to mention both the base and wildcard domain names with -d since let's encrypt don't provide base domain ssl by default in wildcard domain ssl

   * Verifying the certificate
         sudo openssl x509 -text -noout \
         -in /etc/letsencrypt/live/arpansahu.me/fullchain.pem
* Renew certificate (test)
         sudo certbot renew \
         --manual \
         --test-cert \
         --dry-run \
         --preferred-challenges dns \
         --manual-auth-hook 'acme-dns-client'
* Renew certificate (actually)
         sudo certbot renew \
         --manual \
         --preferred-challenges dns \
         --manual-auth-hook 'acme-dns-client'
* Check the entry is added successfully or not
dig _acme-challenge.arpansahu.me
6. Setup Auto-Renew for Letsencrypt WILDCARD Certificate
   * Setup cronjob
sudo crontab -e
* Add the following lines to the file
0 */12 * * * certbot renew --manual --preferred-challenges dns --manual-auth-hook 'acme-dns-client
After all these steps your Nginx configuration file located at /etc/nginx/sites-available/arpansahu will be looking similar to this
server_tokens               off;
access_log                  /var/log/nginx/supersecure.access.log;
error_log                   /var/log/nginx/supersecure.error.log;

server {
    listen         80;
    server_name    great-chat.arpansahu.me;
    # force https-redirects
    if ($scheme = http) {
        return 301 https://$server_name$request_uri;
        }

    location / {
         proxy_pass              http://{ip_of_home_server}:8002;
         proxy_set_header        Host $host;
         proxy_set_header        X-Forwarded-Proto $scheme;

     # WebSocket support
         proxy_http_version 1.1;
         proxy_set_header Upgrade $http_upgrade;
         proxy_set_header Connection "upgrade";
    }

    listen 443 ssl; # managed by Certbot
    ssl_certificate /etc/letsencrypt/live/arpansahu.me/fullchain.pem; # managed by Certbot
    ssl_certificate_key /etc/letsencrypt/live/arpansahu.me/privkey.pem; # managed by Certbot
    include /etc/letsencrypt/options-ssl-nginx.conf; # managed by Certbot
    ssl_dhparam /etc/letsencrypt/ssl-dhparams.pem; # managed by Certbot
}
Step 6: CI/CD using Jenkins
Installing Jenkins
Reference: https://www.jenkins.io/doc/book/installing/linux/
Jenkins requires Java to run, yet certain distributions don’t include this by default and some Java versions are incompatible with Jenkins.
There are multiple Java implementations which you can use. OpenJDK is the most popular one at the moment, we will use it in this guide.
Update the Debian apt repositories, install OpenJDK 11, and check the installation with the commands:
sudo apt update

sudo apt install openjdk-11-jre

java -version
openjdk version "11.0.12" 2021-07-20
OpenJDK Runtime Environment (build 11.0.12+7-post-Debian-2)
OpenJDK 64-Bit Server VM (build 11.0.12+7-post-Debian-2, mixed mode, sharing)
Long Term Support release
curl -fsSL https://pkg.jenkins.io/debian-stable/jenkins.io.key | sudo tee \
  /usr/share/keyrings/jenkins-keyring.asc > /dev/null
echo deb [signed-by=/usr/share/keyrings/jenkins-keyring.asc] \
  https://pkg.jenkins.io/debian-stable binary/ | sudo tee \
  /etc/apt/sources.list.d/jenkins.list > /dev/null
sudo apt-get update
sudo apt-get install jenkins
Start Jenkins
sudo systemctl enable jenkins
You can start the Jenkins service with the command:
sudo systemctl start jenkins
You can check the status of the Jenkins service using the command:
sudo systemctl status jenkins
Now for serving the Jenkins UI from Nginx add the following lines to the Nginx file located at
/etc/nginx/sites-available/service by running the following command
Edit Nginx Configuration
sudo vi /etc/nginx/sites-available/services
if /etc/nginx/sites-available/services does not exists
1. Create a new configuration file: Create a new file in the Nginx configuration directory. The location of this directory varies depending on your operating system and Nginx installation, but it’s usually found at /etc/nginx/sites-available/.
        touch /etc/nginx/sites-available/services
        vi /etc/nginx/sites-available/services
    server {
        listen         80;
        server_name    jenkins.arpansahu.me;
        # force https-redirects
        if ($scheme = http) {
            return 301 https://$server_name$request_uri;
            }

        location / {
             proxy_pass              http://{ip_of_home_server}:8080;
             proxy_set_header        Host $host;
             proxy_set_header    X-Forwarded-Proto $scheme;
        }

        listen 443 ssl; # managed by Certbot
        ssl_certificate /etc/letsencrypt/live/arpansahu.me/fullchain.pem; # managed by Certbot
        ssl_certificate_key /etc/letsencrypt/live/arpansahu.me/privkey.pem; # managed by Certbot
        include /etc/letsencrypt/options-ssl-nginx.conf; # managed by Certbot
        ssl_dhparam /etc/letsencrypt/ssl-dhparams.pem; # managed by Certbot
    }
You can add all the server blocks to the same nginx configuration file
just make sure you place the server block for the base domain at the last
-
To copy .env from the local server directory while building image
add Jenkins ALL=(ALL) NOPASSWD: ALL
inside /etc/sudoers file
and then put
stage('Dependencies') {
            steps {
                script {
                    sh "sudo cp /root/env/project_name/.env /var/lib/jenkins/workspace/pipeline_project_name"
                }
            }
        }
-
Also we Need to modify the Nginx Configuration File
-
Create a new configuration file: Create a new file in the Nginx configuration directory. The location of this directory varies depending on your operating system and Nginx installation, but it’s usually found at /etc/nginx/sites-available/.
    touch /etc/nginx/sites-available/great-chat
    vi /etc/nginx/sites-available/great-chat
-
Add the server block configuration: Copy and paste your server block configuration into this new file.
We can have two configurations, one for docker and one for kubernetes deployment, out jenkins deployment file will handle it accordingly.
-
Nginx for Docker Deployment
        server {
            listen 80;
            server_name great-chat.arpansahu.me;

            # Force HTTPS redirects
            if ($scheme = http) {
                return 301 https://$server_name$request_uri;
            }

            location / {
                proxy_pass http://0.0.0.0:8002;
                proxy_set_header Host $host;
                proxy_set_header X-Forwarded-Proto $scheme;

                # WebSocket support
                proxy_http_version 1.1;
                proxy_set_header Upgrade $http_upgrade;
                proxy_set_header Connection "upgrade";
            }

            listen 443 ssl; # managed by Certbot
            ssl_certificate /etc/letsencrypt/live/arpansahu.me/fullchain.pem; # managed by Certbot
            ssl_certificate_key /etc/letsencrypt/live/arpansahu.me/privkey.pem; # managed by Certbot
            include /etc/letsencrypt/options-ssl-nginx.conf; # managed by Certbot
            ssl_dhparam /etc/letsencrypt/ssl-dhparams.pem; # managed by Certbot
        }
-
Nginx for Kubernetes Deployment
        server {
            listen 80;
            server_name great-chat.arpansahu.me;

            # Force HTTPS redirects
            if ($scheme = http) {
                return 301 https://$server_name$request_uri;
            }

            location / {
                proxy_pass http://<CLUSTER_IP_ADDRESS>:32002;
                proxy_set_header Host $host;
                proxy_set_header X-Forwarded-Proto $scheme;

                # WebSocket support
                proxy_http_version 1.1;
                proxy_set_header Upgrade $http_upgrade;
                proxy_set_header Connection "upgrade";
            }

            listen 443 ssl; # managed by Certbot
            ssl_certificate /etc/letsencrypt/live/arpansahu.me/fullchain.pem; # managed by Certbot
            ssl_certificate_key /etc/letsencrypt/live/arpansahu.me/privkey.pem; # managed by Certbot
            include /etc/letsencrypt/options-ssl-nginx.conf; # managed by Certbot
            ssl_dhparam /etc/letsencrypt/ssl-dhparams.pem; # managed by Certbot
        }
-
Enable the new configuration: Create a symbolic link from this file to the sites-enabled directory.
sudo ln -s /etc/nginx/sites-available/great-chat /etc/nginx/sites-enabled/
-
Test the Nginx configuration: Ensure that the new configuration doesn’t have any syntax errors.
sudo nginx -t
-
Reload Nginx: Apply the new configuration by reloading Nginx.
sudo systemctl reload nginx
in Jenkinsfile-build to copy .env file into build directory
-
Now Create a file named Jenkinsfile-build at the root of Git Repo and add following lines to file
pipeline {
    agent any
    parameters {
        booleanParam(name: 'skip_checks', defaultValue: false, description: 'Skip the Check for Changes stage')
    }
    environment {
        REGISTRY = "harbor.arpansahu.me"
        REPOSITORY = "library/great_chat"
        IMAGE_TAG = "${env.BUILD_ID}"
        COMMIT_FILE = "${env.WORKSPACE}/last_commit.txt"
        ENV_PROJECT_NAME = "great_chat"
    }
    stages {
        stage('Checkout') {
            steps {
                checkout scm
            }
        }
        stage('Check for Changes') {
            steps {
                script {
                    if (params.skip_checks) {
                        echo "Skipping Checks is True. Proceeding with build."
                        BUILD_STATUS = 'BUILT'
                        currentBuild.description = "${currentBuild.fullDisplayName} Skipping Checks is True. Proceeding with build."
                    } else {
                        // Get the current commit hash
                        def currentCommit = sh(script: "git rev-parse HEAD", returnStdout: true).trim()
                        echo "Current commit: ${currentCommit}"

                        // Check if the last commit file exists
                        if (fileExists(COMMIT_FILE)) {
                            def lastCommit = readFile(COMMIT_FILE).trim()
                            echo "Last commit: ${lastCommit}"

                            // Compare the current commit with the last commit
                            if (currentCommit == lastCommit) {
                                echo "No changes detected. Skipping build."
                                currentBuild.description = "${currentBuild.fullDisplayName} build skipped due to no changes detected"
                                return
                            } else {
                                // Check for changes in relevant files
                                def changes = sh(script: "git diff --name-only ${lastCommit} ${currentCommit}", returnStdout: true).trim().split("\n")
                                def relevantChanges = changes.findAll {
                                    !(it in ['README.md', 'SECURITY.md', 'CHANGELOG.md', '.github/dependabot.yml'])
                                }

                                if (relevantChanges.isEmpty()) {
                                    echo "No relevant changes detected. Skipping build."
                                    currentBuild.description = "${currentBuild.fullDisplayName} build skipped due to no relevant changes"
                                    return
                                } else {
                                    echo "Relevant changes detected. Proceeding with build."
                                    BUILD_STATUS = 'BUILT'
                                }
                            }
                        } else {
                            echo "No last commit file found. Proceeding with initial build."
                            BUILD_STATUS = 'BUILT'
                        }

                        // Save the current commit hash to the file
                        writeFile(file: COMMIT_FILE, text: currentCommit)
                    }
                }
            }
        }
        stage('Dependencies') {
            when {
                expression { return BUILD_STATUS != 'NOT_BUILT' }
            }
            steps {
                script {
                    // Copy .env file to the workspace
                    sh "sudo cp /root/projectenvs/${ENV_PROJECT_NAME}/.env ${env.WORKSPACE}/"
                }
            }
        }
        stage('Build Image') {
            when {
                expression { return BUILD_STATUS != 'NOT_BUILT' }
            }
            steps {
                script {
                    // Ensure Docker is running and can be accessed
                    sh 'docker --version'

                    // Log the image details
                    echo "Building Docker image: ${REGISTRY}/${REPOSITORY}:${IMAGE_TAG}"

                    // Build the Docker image
                    sh """
                    docker build -t ${REGISTRY}/${REPOSITORY}:${IMAGE_TAG} .
                    docker tag ${REGISTRY}/${REPOSITORY}:${IMAGE_TAG} ${REGISTRY}/${REPOSITORY}:latest
                    """
                }
            }
        }
        stage('Push Image') {
            when {
                expression { return BUILD_STATUS != 'NOT_BUILT' }
            }
            steps {
                withCredentials([usernamePassword(credentialsId: 'harbor-credentials', passwordVariable: 'DOCKER_REGISTRY_PASSWORD', usernameVariable: 'DOCKER_REGISTRY_USERNAME')]) {
                    script {
                        // Log in to Docker registry using environment variables without direct interpolation
                        sh '''
                        echo $DOCKER_REGISTRY_PASSWORD | docker login ${REGISTRY} -u $DOCKER_REGISTRY_USERNAME --password-stdin
                        '''

                        // Push the Docker image to the registry
                        sh '''
                        docker push ${REGISTRY}/${REPOSITORY}:${IMAGE_TAG}
                        docker push ${REGISTRY}/${REPOSITORY}:latest
                        '''
                    }
                }
            }
        }
    }
    post {
        success {
            script {
                if (!currentBuild.description) {
                    currentBuild.description = "Image: ${REGISTRY}/${REPOSITORY}:${IMAGE_TAG} built and pushed successfully"
                }

                // Send success notification email
                sh """curl -s \
                -X POST \
                --user $MAIL_JET_API_KEY:$MAIL_JET_API_SECRET \
                https://api.mailjet.com/v3.1/send \
                -H "Content-Type:application/json" \
                -d '{
                    "Messages":[
                            {
                                    "From": {
                                            "Email": "$MAIL_JET_EMAIL_ADDRESS",
                                            "Name": "ArpanSahuOne Jenkins Notification"
                                    },
                                    "To": [
                                            {
                                                    "Email": "$MY_EMAIL_ADDRESS",
                                                    "Name": "Development Team"
                                            }
                                    ],
                                    "Subject": "${currentBuild.description}",
                                    "TextPart": "Hola Development Team, your project ${currentBuild.fullDisplayName} : ${currentBuild.description}",
                                    "HTMLPart": "<h3>Hola Development Team, your project ${currentBuild.fullDisplayName} : ${currentBuild.description} </h3> <br> <p> Build Url: ${env.BUILD_URL}  </p>"
                            }
                    ]
                }'"""

                // Trigger great_chat job only if the build is stable
                build job: 'great_chat', parameters: [booleanParam(name: 'DEPLOY', value: true)], wait: false
            }
        }
        failure {
            script {
                // Send failure notification email
                sh """curl -s \
                -X POST \
                --user $MAIL_JET_API_KEY:$MAIL_JET_API_SECRET \
                https://api.mailjet.com/v3.1/send \
                -H "Content-Type:application/json" \
                -d '{
                    "Messages":[
                            {
                                    "From": {
                                            "Email": "$MAIL_JET_EMAIL_ADDRESS",
                                            "Name": "ArpanSahuOne Jenkins Notification"
                                    },
                                    "To": [
                                            {
                                                    "Email": "$MY_EMAIL_ADDRESS",
                                                    "Name": "Development Team"
                                            }
                                    ],
                                    "Subject": "${currentBuild.fullDisplayName} build failed",
                                    "TextPart": "Hola Development Team, your project ${currentBuild.fullDisplayName} build failed ${currentBuild.description} ",
                                    "HTMLPart": "<h3>Hola Development Team, your project ${currentBuild.fullDisplayName} build failed </h3> <br> <p> ${currentBuild.description}  </p>"
                            }
                    ]
                }'"""
            }
        }
    }
}
-
Now Create a file named Jenkinsfile-deploy at the root of Git Repo and add following lines to file
pipeline {
agent { label 'local' }
parameters {
booleanParam(name: 'DEPLOY', defaultValue: false, description: 'Skip the Check for Changes stage')
choice(name: 'DEPLOY_TYPE', choices: ['kubernetes', 'docker'], description: 'Select deployment type')
}
environment {
REGISTRY = "harbor.arpansahu.me"
REPOSITORY = "library/great_chat"
IMAGE_TAG = "latest" // or use a specific tag if needed
KUBECONFIG = "${env.WORKSPACE}/kubeconfig" // Set the KUBECONFIG environment variable
NGINX_CONF = "/etc/nginx/sites-available/great-chat"
ENV_PROJECT_NAME = "great_chat"
DOCKER_PORT = "8002"
PROJECT_NAME_WITH_DASH = "great-chat"
SERVER_NAME= "great-chat.arpansahu.me"
BUILD_PROJECT_NAME = "great_chat_build"
JENKINS_DOMAIN = "jenkins.arpansahu.me"
SENTRY_ORG="arpansahu"
SENTRY_PROJECT="great_chat"
}
stages {
stage('Initialize') {
steps {
script {
echo "Current workspace path is: ${env.WORKSPACE}"
}
}
}
stage('Checkout') {
steps {
checkout scm
}
}
stage('Setup Kubernetes Config') {
when {
expression { return params.DEPLOY_TYPE == 'kubernetes' }
}
steps {
script {
// Copy the kubeconfig file to the workspace
sh "sudo cp /root/.kube/config ${env.WORKSPACE}/kubeconfig"
// Change permissions of the kubeconfig file
sh "sudo chmod 644 ${env.WORKSPACE}/kubeconfig"
}
}
}
stage('Check & Create Nginx Configuration') {
steps {
script {
// Check if the Nginx configuration file exists
def configExists = sh(script: "test -f ${NGINX_CONF} && echo 'exists' || echo 'not exists'", returnStdout: true).trim()
if (configExists == 'not exists') {
echo "Nginx configuration file does not exist. Creating it now..."
// Create or overwrite the NGINX_CONF file with the content of nginx.conf using sudo tee
sh "sudo cat nginx.conf | sudo tee ${NGINX_CONF} > /dev/null"
// Replace placeholders in the configuration file
sh "sudo sed -i 's|SERVER_NAME|${SERVER_NAME}|g' ${NGINX_CONF}"
sh "sudo sed -i 's|DOCKER_PORT|${DOCKER_PORT}|g' ${NGINX_CONF}"
echo "Nginx configuration file created."
// Ensure Nginx is aware of the new configuration
sh "sudo ln -sf ${NGINX_CONF} /etc/nginx/sites-enabled/"
} else {
echo "Nginx configuration file already exists."
}
}
}
}
stage('Retrieve Image Tag from Build Job') {
when {
expression { params.DEPLOY}
}
steps {
script {
echo "Retrieve image tag from ${BUILD_PROJECT_NAME}"
// Construct the API URL for the latest build
def api_url = "https://${JENKINS_DOMAIN}/job/${BUILD_PROJECT_NAME}/lastSuccessfulBuild/api/json"
// Log the API URL for debugging purposes
echo "Hitting API URL: ${api_url}"
withCredentials([usernamePassword(credentialsId: 'fc364086-fb8b-4528-bc7f-1ef3f42b71c7', usernameVariable: 'JENKINS_USER', passwordVariable: 'JENKINS_PASS')]) {
// Execute the curl command to retrieve the JSON response
echo "usernameVariable: ${JENKINS_USER}, passwordVariable: ${JENKINS_PASS}"
def buildInfoJson = sh(script: "curl -u ${JENKINS_USER}:${JENKINS_PASS} ${api_url}", returnStdout: true).trim()
// Log the raw JSON response for debugging
echo "Raw JSON response: ${buildInfoJson}"
def imageTag = sh(script: """
echo '${buildInfoJson}' | grep -oP '"number":\\s*\\K\\d+' | head -n 1
""", returnStdout: true).trim()
echo "Retrieved image tag (build number): ${imageTag}"
// Check if REGISTRY, REPOSITORY, and imageTag are all defined and not empty
if (REGISTRY && REPOSITORY && imageTag) {
if (params.DEPLOY_TYPE == 'kubernetes') {
// Replace the placeholder in the deployment YAML
sh "sed -i 's|:latest|:${imageTag}|g' ${WORKSPACE}/deployment.yaml"
}
if (params.DEPLOY_TYPE == 'docker') {
// Ensure the correct image tag is used in the docker-compose.yml
sh """
sed -i 's|image: .*|image: ${REGISTRY}/${REPOSITORY}:${imageTag}|' docker-compose.yml
"""
}
} else {
echo "One or more required variables (REGISTRY, REPOSITORY, imageTag) are not defined or empty. Skipping docker-compose.yml update."
}
}
}
}
}
stage('Deploy') {
when {
expression { params.DEPLOY }
}
steps {
script {
if (params.DEPLOY_TYPE == 'docker') {
// Copy the .env file to the workspace
sh "sudo cp /root/projectenvs/${ENV_PROJECT_NAME}/.env ${env.WORKSPACE}/"
// Deploy using Docker Compose
sh 'docker-compose down'
sh 'docker-compose pull'
sh 'docker-compose up -d'
// Wait for a few seconds to let the app start
sleep 60
// Verify the container is running
def containerRunning = sh(script: "docker ps -q -f name=${ENV_PROJECT_NAME}", returnStdout: true).trim()
if (!containerRunning) {
error "Container ${ENV_PROJECT_NAME} is not running"
} else {
echo "Container ${ENV_PROJECT_NAME} is running"
// Execute curl and scale down Kubernetes deployment if curl is successful
sh """
# Fetch HTTP status code
HTTP_STATUS=\$(curl -s -o /dev/null -w "%{http_code}" -L http://0.0.0.0:${DOCKER_PORT})
echo "HTTP Status: \$HTTP_STATUS"
# Update Nginx configuration if status code is 200 (OK)
if [ "\$HTTP_STATUS" -eq 200 ]; then
sudo sed -i 's|proxy_pass .*;|proxy_pass http://0.0.0.0:${DOCKER_PORT};|' ${NGINX_CONF}
sudo nginx -s reload
echo 'Nginx configuration updated and reloaded successfully.'
else
echo 'Service not available. Nginx configuration not updated.'
fi
# Scale down Kubernetes deployment if it exists and is running
replicas=\$(kubectl get deployment ${PROJECT_NAME_WITH_DASH}-app -o=jsonpath='{.spec.replicas}') || true
if [ "\$replicas" != "" ] && [ \$replicas -gt 0 ]; then
kubectl scale deployment ${PROJECT_NAME_WITH_DASH}-app --replicas=0
echo 'Kubernetes deployment scaled down successfully.'
else
echo 'No running Kubernetes deployment to scale down.'
fi
"""
}
} else if (params.DEPLOY_TYPE == 'kubernetes') {
// Copy the .env file to the workspace
sh "sudo cp /root/projectenvs/${ENV_PROJECT_NAME}/.env ${env.WORKSPACE}/"
// Check if the file is copied successfully
if (fileExists("${env.WORKSPACE}/.env")) {
echo ".env file copied successfully."
// Verify Kubernetes configuration
sh 'kubectl cluster-info'
// Print current directory
sh 'pwd'
// Delete existing secret if it exists
sh """
kubectl delete secret ${PROJECT_NAME_WITH_DASH}-secret || true
"""
// Delete the existing service and deployment
sh """
kubectl delete service ${PROJECT_NAME_WITH_DASH}-service || true
kubectl scale deployment ${PROJECT_NAME_WITH_DASH}-app --replicas=0 || true
kubectl delete deployment ${PROJECT_NAME_WITH_DASH}-app || true
"""
// Deploy to Kubernetes
sh """
kubectl create secret generic ${PROJECT_NAME_WITH_DASH}-secret --from-env-file=${WORKSPACE}/.env
kubectl apply -f ${WORKSPACE}/service.yaml
kubectl apply -f ${WORKSPACE}/deployment.yaml
"""
// Wait for a few seconds to let the app start
sleep 60
// Check deployment status
// sh """
// kubectl rollout status deployment/${PROJECT_NAME_WITH_DASH}-app
// """
sh """
kubectl describe deployment/${PROJECT_NAME_WITH_DASH}-app
"""
// Verify service and get NodePort
def nodePort = sh(script: "kubectl get service ${PROJECT_NAME_WITH_DASH}-service -o=jsonpath='{.spec.ports[0].nodePort}'", returnStdout: true).trim()
echo "Service NodePort: ${nodePort}"
// Get cluster IP address
def clusterIP = sh(script: "kubectl get nodes -o=jsonpath='{.items[0].status.addresses[0].address}'", returnStdout: true).trim()
echo "Cluster IP: ${clusterIP}"
// Verify if the service is accessible and delete the Docker container if accessible and update nginx configuration
sh """
HTTP_STATUS=\$(curl -s -o /dev/null -w "%{http_code}" -L http://${clusterIP}:${nodePort})
echo "HTTP Status: \$HTTP_STATUS"
if [ "\$HTTP_STATUS" -eq 200 ]; then
echo "Service is reachable at http://${clusterIP}:${nodePort}"
echo "Updating Nginx configuration at ${NGINX_CONF}..."
sudo sed -i 's|proxy_pass .*;|proxy_pass http://${clusterIP}:${nodePort};|' ${NGINX_CONF}
if [ \$? -ne 0 ]; then
echo "Failed to update Nginx configuration"
exit 1
fi
echo "Reloading Nginx..."
sudo nginx -s reload
if [ \$? -ne 0 ]; then
echo "Failed to reload Nginx"
exit 1
fi
echo "Nginx reloaded successfully"
DOCKER_CONTAINER=\$(docker ps -q -f name=${ENV_PROJECT_NAME})
if [ "\$DOCKER_CONTAINER" ]; then
echo "Docker container ${ENV_PROJECT_NAME} is running. Removing it..."
docker rm -f ${ENV_PROJECT_NAME}
if [ \$? -ne 0 ]; then
echo "Failed to remove Docker container ${ENV_PROJECT_NAME}"
exit 1
fi
else
echo "Docker container ${ENV_PROJECT_NAME} is not running. Skipping removal"
fi
else
echo "Service is not reachable at http://${clusterIP}:${nodePort}. HTTP Status: \$HTTP_STATUS"
exit 1
fi
"""
} else {
error ".env file not found in the workspace."
}
}
currentBuild.description = 'DEPLOYMENT_EXECUTED'
}
}
}
stage('Sentry release') {
when {
expression { params.DEPLOY }
}
steps {
script {
echo "Sentry Release ..."
sh """
# Get the current git commit hash
VERSION=\$(git rev-parse HEAD)
sentry-cli releases -o ${SENTRY_ORG} -p ${SENTRY_PROJECT} new \$VERSION
# Associate commits with the release
sentry-cli releases -o ${SENTRY_ORG} -p ${SENTRY_PROJECT} set-commits --auto \$VERSION
# Deploy the release (optional step for marking the release as deployed)
sentry-cli releases -o ${SENTRY_ORG} -p ${SENTRY_PROJECT} deploys \$VERSION new -e production
"""
}
}
}
}
post {
success {
script {
if (currentBuild.description == 'DEPLOYMENT_EXECUTED') {
sh """curl -s \
-X POST \
--user $MAIL_JET_API_KEY:$MAIL_JET_API_SECRET \
https://api.mailjet.com/v3.1/send \
-H "Content-Type:application/json" \
-d '{
"Messages":[
{
"From": {
"Email": "$MAIL_JET_EMAIL_ADDRESS",
"Name": "ArpanSahuOne Jenkins Notification"
},
"To": [
{
"Email": "$MY_EMAIL_ADDRESS",
"Name": "Development Team"
}
],
"Subject": "Jenkins Build Pipeline your project ${currentBuild.fullDisplayName} Ran Successfully",
"TextPart": "Hola Development Team, your project ${currentBuild.fullDisplayName} is now deployed",
"HTMLPart": "<h3>Hola Development Team, your project ${currentBuild.fullDisplayName} is now deployed </h3> <br> <p> Build Url: ${env.BUILD_URL} </p>"
}
]
}'"""
}
// Trigger the common_readme job on success when last commit is not Automatic Update from common_readme
def commitMessage = sh(script: "git log -1 --pretty=%B", returnStdout: true).trim()
if (!commitMessage.contains("Automatic Update")) {
def expandedProjectUrl = "https://github.com/arpansahu/${ENV_PROJECT_NAME}"
build job: 'common_readme', parameters: [
string(name: 'project_git_url', value: expandedProjectUrl),
string(name: 'environment', value: 'prod')
], wait: false
} else {
echo "Skipping common_readme job trigger due to commit message: ${commitMessage}"
}
}
}
failure {
sh """curl -s \
-X POST \
--user $MAIL_JET_API_KEY:$MAIL_JET_API_SECRET \
https://api.mailjet.com/v3.1/send \
-H "Content-Type:application/json" \
-d '{
"Messages":[
{
"From": {
"Email": "$MAIL_JET_EMAIL_ADDRESS",
"Name": "ArpanSahuOne Jenkins Notification"
},
"To": [
{
"Email": "$MY_EMAIL_ADDRESS",
"Name": "Developer Team"
}
],
"Subject": "Jenkins Build Pipeline your project ${currentBuild.fullDisplayName} Ran Failed",
"TextPart": "Hola Development Team, your project ${currentBuild.fullDisplayName} deployment failed",
"HTMLPart": "<h3>Hola Development Team, your project ${currentBuild.fullDisplayName} is not deployed, Build Failed </h3> <br> <p> Build Url: ${env.BUILD_URL} </p>"
}
]
}'"""
}
}
}
Note: agent {label 'local'} is used to specify which node will execute the jenkins job deployment. So local linux server is labelled with 'local' are the project with this label will be executed in local machine node.
-
Configure a Jenkins project from jenkins ui located at https://jenkins.arpansahu.me
Make sure to use Pipeline project and name it whatever you want I have named it as per great_chat

-
Configure another Jenkins project from jenkins ui located at https://jenkins.arpansahu.me
Make sure to use Pipeline project and name it whatever you want I have named it as great_chat_build

This pipeline is triggered on another branch named as build. Whenever a new commit is pushed, it checks
if there are changes in the files other then few .md files and dependabot.yml file. If, changes are there it pushed the image.
If image is pushed successfully, email is sent to notify and then another Jenkins Pipeline great_chat_build is called.
In this above picture you can see credentials right? you can add your github credentials and harbor credentials use harbor-credentials as id for harbor credentials.
from Manage Jenkins on home Page --> Manage Credentials
and add your GitHub credentials from there
-
Add a .env file to you project using following command (This step is no more required stage('Dependencies'))
sudo vi /var/lib/jenkins/workspace/great_chat/.env
Your workspace name may be different.

Add all the env variables as required and mentioned in the Readme File.
Now you are good to go.
Services on AWS EC2/ Home Server Ubuntu 22.0 LTS s
Postgresql Server
IT would be a nightmare to have your own vps to save cost and not hosting your own postgresql server.
postgresql_server can be access accessed
Installing PostgreSql
-
Update the package list to make sure you have the latest information
sudo apt update
-
Install the PostgreSQL package
sudo apt install postgresql postgresql-contrib
-
PostgreSQL should now be installed on your server. By default, PostgreSQL creates a user named
postgres
with administrative privileges. You can switch to this user to perform administrative tasks:
sudo -i -u postgres
-
Access the PostgreSQL interactive terminal by running:
psql
-
Set a password for the
postgres
user:
ALTER USER postgres WITH PASSWORD 'your_password';
Replace
'your_password'
with the desired password.
-
Exit the PostgreSQL shell:
\q
-
Exit the
postgres
user session:
exit
Now, PostgreSQL is installed on your Ubuntu server. You can access the PostgreSQL database by logging in with the
postgres
user and the password you set.
Remember to configure your PostgreSQL server according to your security needs, such as modifying the
pg_hba.conf
file to control access, setting up SSL for secure connections, and configuring other PostgreSQL settings as required for your environment.
Configuring Postgresql
-
open postgresql.conf file
sudo vi /etc/postgresql/14/main/postgresql.conf
14 is the version which i have installed your version can be different
-
Find the listen_addresses line and set it to:
listen_addresses = 'localhost'
Now the thing is if u don't want to serve it using nginx u can also set it to * all so that database can be connected from any where
-
Edit pg_hba.conf to allow connections:
sudo nano /etc/postgresql/14/main/pg_hba.conf
14 is the version which i have installed your version can be different
-
Add the following line in the end:
host all all 127.0.0.1/32 md5
if u want to use without nginx
host all all 0.0.0.0/0 md5
I have added both
-
Restart PostgreSQL to apply changes:
sudo systemctl restart postgresql
Configuring Nginx as Reverse proxy
Note: In previous steps we have already seen how to setup the reverse proxy with Nginx for Django projects and installation process and everything
-
Install the nginx-extras package to support the stream module:
    sudo apt install nginx-extras
````

2.  Add a stream configuration file for the PostgreSQL stream:

```bash
    sudo vi /etc/nginx/nginx.conf
1. Add the following configuration:
    stream {
        upstream postgresql_upstream {
            server 127.0.0.1:5432;  # PostgreSQL server
        }

        server {
            listen 9550 ssl;  # Use SSL on port 443
            proxy_pass postgresql_upstream;

            ssl_certificate /etc/letsencrypt/live/arpansahu.me/fullchain.pem;  # SSL certificate
            ssl_certificate_key /etc/letsencrypt/live/arpansahu.me/privkey.pem;  # SSL certificate key
            ssl_dhparam /etc/letsencrypt/ssl-dhparams.pem;  # SSL DH parameters
            include /etc/letsencrypt/options-ssl-nginx.conf;  # SSL options

            proxy_timeout 600s;
            proxy_connect_timeout 600s;
        }
    }
Since i have generated ssl certs already in nginx setup i am using those certificates here itself

2.  Test the Nginx Configuration:
sudo nginx -t
If error comes nginx: [emerg] "stream" directive is not allowed here in /etc/nginx/conf.d/postgresql.conf:1
nginx: configuration file /etc/nginx/nginx.conf test failed

Follow these steps:

    0.  Remove the custom configuration file:
sudo rm /etc/nginx/conf.d/postgresql.conf
1. Open the main Nginx configuration file:
sudo nano /etc/nginx/nginx.conf
    2.  Add the Stream Block at the Appropriate Place
    Add the following stream block at the end of the nginx.conf file, or within the appropriate context:
            user www-data;
            worker_processes auto;
            pid /run/nginx.pid;
            include /etc/nginx/modules-enabled/*.conf;

            events {
                worker_connections 768;
            }

            http {
                sendfile on;
                tcp_nopush on;
                tcp_nodelay on;
                keepalive_timeout 65;
                types_hash_max_size 2048;

                include /etc/nginx/mime.types;
                default_type application/octet-stream;

                access_log /var/log/nginx/access.log;
                error_log /var/log/nginx/error.log;

                gzip on;
                gzip_disable "msie6";

                include /etc/nginx/conf.d/*.conf;
                include /etc/nginx/sites-enabled/*;
            }

            stream {
                upstream postgresql_upstream {
                    server 127.0.0.1:5432;  # PostgreSQL server
                }

                server {
                    listen 9550 ssl;  # Use SSL on port different 443
                    proxy_pass postgresql_upstream;

                    ssl_certificate /etc/letsencrypt/live/arpansahu.me/fullchain.pem;  # SSL certificate
                    ssl_certificate_key /etc/letsencrypt/live/arpansahu.me/privkey.pem;  # SSL certificate key
                    ssl_dhparam /etc/letsencrypt/ssl-dhparams.pem;  # SSL DH parameters
                    include /etc/letsencrypt/options-ssl-nginx.conf;  # SSL options

                    proxy_timeout 600s;
                    proxy_connect_timeout 600s;
                }
            }
3. Test the Nginx Configuration
sudo nginx -t
3. Reload Nginx to apply the new configuration:
sudo systemctl reload nginx
-
Testing connecting with postgres without ip and using domain
psql "postgres://username:password@domain/database_name?sslmode=require"
psql "postgres://user:user_pass@arpansahu.me/database_name?sslmode=require"
Installing PgAdmin
-
Create a Virtual Environment:
It's good practice to use virtual environments to isolate your project's dependencies. This helps avoid conflicts with system packages. You can create a virtual environment like this:
   python3 -m venv pgadmin_venv
   source pgadmin_venv/bin/activate
-
Install pgAdmin 4:
Once you are in the virtual environment, install pgAdmin 4:
pip install pgadmin4
If you encounter any dependency conflicts, the virtual environment will help isolate the packages.
-
Run pgAdmin 4:
After installing, try running pgAdmin 4:
pgadmin4
By using a virtual environment, you avoid potential conflicts with system packages, and you can manage dependencies for pgAdmin 4 more effectively.
Remember to activate your virtual environment whenever you want to run pgAdmin 4:
source pgadmin_venv/bin/activate
pgadmin4
Manage PgAdmin using Pm2
-
Create a Startup Script for pgAdmin 4
touch /root/run_pgadmin.sh
-
Edit this script and add following
vi /root/run_pgadmin.sh
        source pgadmin_venv/bin/activate
        pgadmin4
-
Making Script Executable
chmod +x /root/run_pgadmin.sh
-
Installing pm2
npm install pm2 -g
-
Start pgAdmin 4 with PM2
pm2 start /root/run_pgadmin.sh --name pgadmin4
-
Save PM2 configuration
pm2 save
-
Set PM2 to Start on Boot
pm2 startup
And deactivate it when you're done:
deactivate
-
Edit Host from 127.0.0.1 tto 0.0.0.0
vi /root/pgadmin_venv/lib/python3.10/site-packages/pgadmin4/config.py
Configuring Nginx as Reverse proxy
-
Edit Nginx Configuration
sudo vi /etc/nginx/sites-available/services
if /etc/nginx/sites-available/services does not exists

    1. Create a new configuration file: Create a new file in the Nginx configuration directory. The location of this directory varies depending on your  operating system and Nginx installation, but it’s usually found at /etc/nginx/sites-available/.
            touch /etc/nginx/sites-available/services
            vi /etc/nginx/sites-available/services
-
Add this server configuration
    server {
        listen         80;
        server_name    pgadmin.arpansahu.me;
        # force https-redirects
        if ($scheme = http) {
            return 301 https://$server_name$request_uri;
            }

        location / {
            proxy_pass              http://0.0.0.0:9997;
            proxy_set_header        Host $host;
            proxy_set_header    X-Forwarded-Proto $scheme;
        }

        listen 443 ssl; # managed by Certbot
        ssl_certificate /etc/letsencrypt/live/arpansahu.me/fullchain.pem; # managed by Certbot
        ssl_certificate_key /etc/letsencrypt/live/arpansahu.me/privkey.pem; # managed by Certbot
        include /etc/letsencrypt/options-ssl-nginx.conf; # managed by Certbot
        ssl_dhparam /etc/letsencrypt/ssl-dhparams.pem; # managed by Certbot
    }
-
Test the Nginx Configuration
sudo nginx -t
-
Reload Nginx to apply the new configuration
sudo systemctl reload nginx
Conclusion
This approach should help you manage the dependencies and resolve the version conflicts more effectively while ensuring pgAdmin runs in the background and is accessible via Nginx as a reverse proxy.
My PGAdmin4 can be accessed here : https://pgadmin.arpansahu.me/
Portainer
Portainer is a web UI to manage your docker, and kubernetes. Portainer consists of two elements, the Portainer Server, and the Portainer Agent. Both elements run as lightweight Docker containers on a Docker engine.
Installing Portainer
-
Create a Docker Volume for Portainer Data (optional but recommended):
This step is optional but recommended as it allows you to persist Portainer's data across container restarts.
docker volume create portainer_data
-
Run Portainer Container:
Run the Portainer container using the following command. Replace
/var/run/docker.sock
with the path to your Docker socket if it's in a different location.
    docker run -d -p 0.0.0.0:9998:9000 -p 9444:8000 -p 9443:9443 --name=portainer --restart=always -v /var/run/docker.sock:/var/run/docker.sock -v portainer_data:/data portainer/portainer-ce
    to use it in nginx server configuration
This command pulls the Portainer Community Edition image from Docker Hub, creates a persistent volume for Portainer data, and starts the Portainer container. The
-p 9000:9000
option maps Portainer's web interface to port 9000 on your host.
-
Access Portainer UI:
Open your web browser and go to
http://localhost:9000
(or replace
localhost
with your server's IP address if you are using a remote server). You will be prompted to set up an admin user and password.
-
Connect Portainer to the Docker Daemon:
On the Portainer setup page, choose the "Docker" environment, and connect Portainer to the Docker daemon. You can usually use the default settings (
unix:///var/run/docker.sock
for the Docker API endpoint).
-
Complete Setup:
Follow the on-screen instructions to complete the setup process. You may choose to deploy a local agent for better performance, but it's not required for basic functionality.
Once the setup is complete, you should have access to the Portainer dashboard, where you can manage and monitor your Docker containers, images, volumes, and networks through a user-friendly web interface.
Keep in mind that the instructions provided here assume a basic setup. For production environments, it's recommended to secure the Portainer instance, such as by using HTTPS and setting up authentication. Refer to the
Portainer documentation
for more advanced configurations and security considerations.
Configuring Nginx as Reverse proxy
-
Edit Nginx Configuration
sudo vi /etc/nginx/sites-available/services
if /etc/nginx/sites-available/services does not exists

    1. Create a new configuration file: Create a new file in the Nginx configuration directory. The location of this directory varies depending on your  operating system and Nginx installation, but it’s usually found at /etc/nginx/sites-available/.
            touch /etc/nginx/sites-available/services
            vi /etc/nginx/sites-available/services
-
Add this server configuration
    server {
        listen         80;
        server_name    portainer.arpansahu.me;
        # force https-redirects
        if ($scheme = http) {
            return 301 https://$server_name$request_uri;
            }

        location / {
            proxy_pass              http://0.0.0.0:9998;
            proxy_set_header        Host $host;
            proxy_set_header    X-Forwarded-Proto $scheme;
        }

        listen 443 ssl; # managed by Certbot
        ssl_certificate /etc/letsencrypt/live/arpansahu.me/fullchain.pem; # managed by Certbot
        ssl_certificate_key /etc/letsencrypt/live/arpansahu.me/privkey.pem; # managed by Certbot
        include /etc/letsencrypt/options-ssl-nginx.conf; # managed by Certbot
        ssl_dhparam /etc/letsencrypt/ssl-dhparams.pem; # managed by Certbot
    }
-
Test the Nginx Configuration
sudo nginx -t
-
Reload Nginx to apply the new configuration
sudo systemctl reload nginx
Running Portainer Agent
-
Run this command to start the portainer agent docker container
        docker run -d -p 9995:9001 \
        --name portainer_agent \
        --restart=always \
        -v /var/run/docker.sock:/var/run/docker.sock \
        -v /var/lib/docker/volumes:/var/lib/docker/volumes \
        portainer/agent:2.19.5
-
Configuring Nginx as Reverse proxy
-
Edit Nginx Configuration
sudo vi /etc/nginx/sites-available/services
if /etc/nginx/sites-available/services does not exists

    1. Create a new configuration file: Create a new file in the Nginx configuration directory. The location of this directory varies depending on your  operating system and Nginx installation, but it’s usually found at /etc/nginx/sites-available/.
            touch /etc/nginx/sites-available/services
            vi /etc/nginx/sites-available/services
2. Add this server configuration
        server {
            listen         80;
            server_name    portainer-agent.arpansahu.me;
            # force https-redirects
            if ($scheme = http) {
                return 301 https://$server_name$request_uri;
                }

            location / {
                proxy_pass              http://0.0.0.0:9995;
                proxy_set_header        Host $host;
                proxy_set_header    X-Forwarded-Proto $scheme;
            }

            listen 443 ssl; # managed by Certbot
            ssl_certificate /etc/letsencrypt/live/arpansahu.me/fullchain.pem; # managed by Certbot
            ssl_certificate_key /etc/letsencrypt/live/arpansahu.me/privkey.pem; # managed by Certbot
            include /etc/letsencrypt/options-ssl-nginx.conf; # managed by Certbot
            ssl_dhparam /etc/letsencrypt/ssl-dhparams.pem; # managed by Certbot
        }
3. Test the Nginx Configuration
sudo nginx -t
4. Reload Nginx to apply the new configuration
sudo systemctl reload nginx
-
Adding Environment
-
Go to environment ---> Choose Docker Standalone ----> Start Wizard
-
Will show you a command same as step 1. Run this command to start the portainer agent docker container, this is default command we have modified ports although
            docker run -d -p 9001:9001 \
            --name portainer_agent \
            --restart=always \
            -v /var/run/docker.sock:/var/run/docker.sock \
            -v /var/lib/docker/volumes:/var/lib/docker/volumes \
            portainer/agent:2.19.5
3. Add Name, I have used docker-prod-env
4. Add Environment address domain:port combination is needed in my case portainer-agent.arpansahu.me: 9995
5. Click Connect
My Portainer can be accessed here : https://portainer.arpansahu.me/
Redis Server
Redis is versatile and widely used for its speed and efficiency in various applications. Its ability to serve different roles, such as caching, real-time analytics, and pub/sub messaging, makes it a valuable tool in many technology stacks.
Installing Redis and Setting Up Authentication
-
Step 1: Install Redis on Ubuntu
-
Update your package list:
sudo apt update
-
Install Redis:
sudo apt install redis-server
-
Start and enable Redis:
      sudo systemctl start redis
      sudo systemctl enable redis
-
Step 2: Configure Redis
-
Open the Redis configuration file:
sudo vi /etc/redis/redis.conf
-
Change the host to 0.0.0.0:
Find the line with
bind 127.0.0.1 ::1
and change it to:
bind 0.0.0.0
-
Set up authentication:
Find the line with
# requirepass foobared
and uncomment it. Replace
foobared
with your desired password:
requirepass your_secure_password
-
Save and exit the editor
(
esc + :wq + enter
in vi).
-
Restart Redis to apply the changes:
sudo systemctl restart redis
-
Step 3: Verify Configuration
-
Connect to Redis using the CLI:
redis-cli
-
Authenticate with your password:
AUTH your_secure_password
-
Check the connection:
PING
You should receive a response:
PONG
-
Verify the binding to 0.0.0.0:
sudo netstat -tulnp | grep redis
You should see Redis listening on `0.0.0.0:6379`.
-
Step 4: Connecting to Redis
-
Connect to Redis using the CLI from a remote host:
redis-cli -h arpansahu.me -p 6379 -a your_secure_password
Note: If you want to use SSL connection
-
Open the Redis configuration file:
sudo vi /etc/redis/redis.conf
-
Add the following configuration:
    tls-port 6379
    port 0

    tls-cert-file /path/to/redis.crt
    tls-key-file /path/to/redis.key
    tls-dh-params-file /path/to/dhparam.pem

    tls-auth-clients no
Mostly Redis is used as cache and we want it to be super fast; hence, we are not putting it behind a reverse proxy like Nginx, similar to PostgreSQL.
Mostly redis is used as cache and we want it to be super fast hence we are not putting it behind reverse proxy e.g. nginx same as postgres
Also one more thing redis by default don't support ssl connections even if u use ssl
redis server can be accessed
redis-cli -h arpansahu.me -p 6379 -a password_required
Redis Commander
Redis Commander is a web-based management tool for Redis databases. It provides a user-friendly interface to interact with Redis, making it easier to manage and monitor your Redis instances.
Installing Redis Commander
-
Installation:
You can install redis-commander globally using npm (Node Package Manager) with the following command:
npm install -g redis-commander
-
Run
redis-commander --redis-host your-redis-server-ip --redis-port your-redis-port --redis-password your-redis-password --port 9996
Serving with Nginx, as well password protecting Redis Commander
Redis Commander d'ont have native password protection enabled
-
Create a Basic Authentication File
Use the htpasswd utility to create a username and password combination. Replace your_username with your desired username.
sudo htpasswd -c /etc/nginx/.htpasswd your_username
You’ll be prompted to enter a password.
-
Edit Nginx Configuration
sudo vi /etc/nginx/sites-available/services
if /etc/nginx/sites-available/services does not exists

    1. Create a new configuration file: Create a new file in the Nginx configuration directory. The location of this directory varies depending on your  operating system and Nginx installation, but it’s usually found at /etc/nginx/sites-available/.
            touch /etc/nginx/sites-available/services
            vi /etc/nginx/sites-available/services
-
Add this server block to it.
    server {
        listen         80;
        server_name    redis.arpansahu.me;
        # force https-redirects
        if ($scheme = http) {
            return 301 https://$server_name$request_uri;
            }

        location / {
            proxy_pass              http://127.0.0.1:9996;
            proxy_set_header        Host $host;
            proxy_set_header    X-Forwarded-Proto $scheme;
            auth_basic "Restricted Access";
            auth_basic_user_file /etc/nginx/.htpasswd;
        }

        listen 443 ssl; # managed by Certbot
        ssl_certificate /etc/letsencrypt/live/arpansahu.me/fullchain.pem; # managed by Certbot
        ssl_certificate_key /etc/letsencrypt/live/arpansahu.me/privkey.pem; # managed by Certbot
        include /etc/letsencrypt/options-ssl-nginx.conf; # managed by Certbot
    }
-
Test the Nginx Configuration
sudo nginx -t
-
Reload Nginx to apply the new configuration
sudo systemctl reload nginx
Running Redis Commander in background Using pm2
-
Install pm2 globally (if not already installed):
npm install -g pm2
-
Start redis-commander with pm2:
pm2 start redis-commander --name redis-commander -- --port 9996 --redis-host your-redis-server-ip --redis-port your-redis-port --redis-password your-redis-password
This starts redis-commander with pm2 and names the process “redis-commander.”
-
Optionally, you can save the current processes to ensure they restart on system reboot:
pm2 save
pm2 startup
Now, redis-commander is running in the background managed by pm2. You can view its status, logs, and manage it using pm2 commands. For example:
-
View the status:
pm2 status
Stop the process:
pm2 stop redis-commander
Restart the process:
pm2 restart redis-commander
View logs:
pm2 logs redis-commander
My Redis Commander can be accessed here : https://redis.arpansahu.me/
MinIO (Self hosted S3 Storage)
MinIO is a high-performance, distributed object storage system designed for large-scale data infrastructures. It is open-source and compatible with the Amazon S3 API, making it a popular choice for organizations looking for scalable, secure, and cost-effective storage solutions.
Installing Minio
-
Install MinIO on your server. You can download it from the official website or use a package manager if available.
    wget https://dl.min.io/server/minio/release/linux-amd64/minio
    chmod +x minio
    sudo mv minio /usr/local/bin
-
Generate SSL Certificates using Certbot
While setting up nginx we already automated this auto regeneration of certificates every3 months
The certificates will be stored in /etc/letsencrypt/live/arpansahu.me/.
-
Configure MinIO with SSL Certificates:
Configure MinIO to use the SSL certificates generated by Certbot. Create a directory to store the certificates and copy them from the Certbot directory.
    sudo mkdir -p /etc/minio/certs
    sudo cp /etc/letsencrypt/live/yourdomain.com/fullchain.pem /etc/minio/certs/public.crt
    sudo cp /etc/letsencrypt/live/yourdomain.com/privkey.pem /etc/minio/certs/private.key
-
Environment File Configuration
Ensure your environment file, usually located at /etc/default/minio, has the following content: if the file is not present create it
    MINIO_VOLUMES="/mnt/minio"

    # Define where to find the TLS certificates
    MINIO_OPTS="--certs-dir /etc/minio/certs --console-address :9001"

    # Define the admin user (min 3 characters)
    MINIO_ROOT_USER=user_edit_this

    # Define the default admin user password (min 8 characters)
    MINIO_ROOT_PASSWORD=password_edit_this
-
Setup Directory and Permissions
    sudo mkdir -p /mnt/minio
    sudo chown -R minio-user:minio-user /mnt/minio

    sudo mkdir -p /etc/minio/certs
    sudo chown -R minio-user:minio-user /etc/minio/certs

    sudo chown minio-user:minio-user /etc/minio/certs/public.crt
    sudo chown minio-user:minio-user /etc/minio/certs/private.key
-
Reload Systemd and Start MinIO
Reload the system daemon and start the MinIO service
    sudo systemctl daemon-reload
    sudo systemctl start minio
Note: minio api and ui server both run at 0.0.0.0 host by default
Nginx Setup as Reverse Proxy
Note: Nginx is already set in the other steps as seen before right now I will discuss server configuration for minio and minioui
-
Nginx Server configuration for minio API server
    server {
        listen         80;
        server_name    minio.arpansahu.me;

        # Redirect HTTP to HTTPS
        if ($scheme = http) {
            return 301 https://$server_name$request_uri;
        }
    }

    server {
        listen         443 ssl;
        server_name    minio.arpansahu.me;

        # SSL certificates
        ssl_certificate /etc/minio/certs/public.crt;
        ssl_certificate_key /etc/minio/certs/private.key;

        # Allow special characters in headers
        ignore_invalid_headers off;

        # Allow any size file to be uploaded.
        # Set to a value such as 1000m; to restrict file size to a specific value
        client_max_body_size 0;

        # Disable buffering
        proxy_buffering off;
        proxy_request_buffering off;

        location / {
            proxy_pass          https://0.0.0.0:9000;
            proxy_set_header    Host $host;
            proxy_set_header    X-Real-IP $remote_addr;
            proxy_set_header    X-Forwarded-For $proxy_add_x_forwarded_for;
            proxy_set_header    X-Forwarded-Proto $scheme;

            # Set maximum allowed body size for uploads
            client_max_body_size 0; # Adjust the value as needed

            proxy_connect_timeout 300;
            # Default is HTTP/1, keepalive is only enabled in HTTP/1.1
            proxy_http_version 1.1;
            proxy_set_header Connection "";
            chunked_transfer_encoding off;
        }
    }
-
Nginx Server configuration for minio ui server
    server {
        listen         80;
        server_name    minioui.arpansahu.me;
        # force https-redirects
        if ($scheme = http) {
            return 301 https://$server_name$request_uri;
            }

        location / {
             proxy_pass               https://0.0.0.0:9001;
             proxy_set_header        Host $host;
             proxy_set_header    X-Forwarded-Proto $scheme;

             # WebSocket support
             proxy_http_version 1.1;
             proxy_set_header Upgrade $http_upgrade;
             proxy_set_header Connection "upgrade";
        }

        listen 443 ssl; # managed by Certbot
        ssl_certificate /etc/letsencrypt/live/arpansahu.me/fullchain.pem; # managed by Certbot
        ssl_certificate_key /etc/letsencrypt/live/arpansahu.me/privkey.pem; # managed by Certbot
        include /etc/letsencrypt/options-ssl-nginx.conf; # managed by Certbot
        ssl_dhparam /etc/letsencrypt/ssl-dhparams.pem; # managed by Certbot
    }
Setup Copy Cron to copy whenever cerbot updates the certificate to /etc/minio/certs
-
Create a Cron Shell file
sudo vi /usr/local/bin/update_minio_certs.sh
-
Add this script to update_minio_certs.sh
    #!/bin/bash
    # Paths to the Let's Encrypt certificates
    CERT_SRC_DIR="/etc/letsencrypt/live/yourdomain.com"
    CERT_DST_DIR="/etc/minio/certs"

    # Path to the public certificate and private key in the source directory
    SRC_PUBLIC_CERT="${CERT_SRC_DIR}/fullchain.pem"
    SRC_PRIVATE_KEY="${CERT_SRC_DIR}/privkey.pem"

    # Path to the public certificate and private key in the destination directory
    DST_PUBLIC_CERT="${CERT_DST_DIR}/public.crt"
    DST_PRIVATE_KEY="${CERT_DST_DIR}/private.key"

    # Function to send email using Mailjet API
    send_email() {
        local subject=$1
        local body=$2

        python3 <<END
    import os
    from mailjet_rest import Client

    api_key = 'your-mailjet-api-key'
    api_secret = 'your-mailjet-api-secret'
    mailjet = Client(auth=(api_key, api_secret), version='v3.1')

    data = {
    'Messages': [
        {
        "From": {
            "Email": "your-email@example.com",
            "Name": "MinIO Cert Update"
        },
        "To": [
            {
            "Email": "recipient-email@example.com",
            "Name": "Recipient"
            }
        ],
        "Subject": "$subject",
        "TextPart": "$body"
        }
    ]
    }

    result = mailjet.send.create(data=data)
    print(result.status_code)
    print(result.json())
    END
    }

    # Check if the certificates have changed and copy if they have
    if ! cmp -s "$SRC_PUBLIC_CERT" "$DST_PUBLIC_CERT" || ! cmp -s "$SRC_PRIVATE_KEY" "$DST_PRIVATE_KEY"; then
        sudo cp "$SRC_PUBLIC_CERT" "$DST_PUBLIC_CERT"
        sudo cp "$SRC_PRIVATE_KEY" "$DST_PRIVATE_KEY"
        sudo systemctl restart minio
        echo "MinIO certificates updated and service restarted at $(date)" >> /var/log/minio_cert_update.log
        send_email "MinIO Certificates Updated" "MinIO certificates were updated and the service was restarted on $(date)."
    else
        echo "No changes detected in MinIO certificates at $(date)" >> /var/log/minio_cert_update.log
        send_email "No Changes in MinIO Certificates" "No changes were detected in MinIO certificates on $(date)."
    fi
Here you need to replace your-mailjet-api-key, your-mailjet-api-secret, your-email@example.com and yourdomain.com

1. Get Api Credentials from mailJet visit https://www.mailjet.com
-
Changing permissions to execute update_minio_certs.sh
sudo chmod +x /usr/local/bin/update_minio_certs.sh
-
Update Cron Job or Systemd Timer
sudo crontab -e
Add the following line to run the script every day at midnight:
0 0 * * * /usr/local/bin/update_minio_certs.sh
-
Install mailjet-rest python module
pip install mailjet-rest
-
Test the script
        cd /usr/local/bin
        ./update_minio_certs.sh
You can connect to my MinIO Server using terminal
  mc alias set myminio https://arpansahu.me api_key api_secret --api S3v4
  mc ls
Website Uptime Monitor
This project monitors the uptime of specified websites and sends an email alert if any website is down or returns a non-2xx status code. The project uses a shell script to set up a virtual environment, install dependencies, run the monitoring script, and then clean up the virtual environment.
Prerequisites
-
Python 3
-
Pip (Python package installer)
-
Mailjet account for email alerts
-
Cron for scheduling the script
Setup
1. Clone the Repository
git clone https://github.com/yourusername/website-uptime-monitor.git
cd website-uptime-monitor
2. Create a
.env
File
Create a
.env
file in the root directory and add the following content:
MAILJET_API_KEY=your_mailjet_api_key
MAILJET_SECRET_KEY=your_mailjet_secret_key
SENDER_EMAIL=your_sender_email@example.com
RECEIVER_EMAIL=your_receiver_email@example.com
Running the Script
To run the script manually, give permissions and execute:
chmod +x ./setup_and_run.sh
./setup_and_run.sh
chmod +x ./docker_cleanup_mail.sh
./docker_cleanup_mail.sh
Setting Up a Cron Job
To run the script automatically at regular intervals, set up a cron job:
-
Edit the crontab:
crontab -e
-
Add the following line to run the script every 5 hours:
0 */5 * * * /bin/bash /root/arpansahu-one-scripts/setup_and_run.sh >> /root/logs/website_up_time.log 2>&1
0 0 * * * export MAILJET_API_KEY="MAILJET_API_KEY" && export MAILJET_SECRET_KEY="MAILJET_SECRET_KEY" && export SENDER_EMAIL="SENDER_EMAIL" && export RECEIVER_EMAIL="RECEIVER_EMAIL" && /usr/bin/docker system prune -af --volumes > /root/logs/docker_prune.log 2>&1 && /root/arpansahu-one-scripts/docker_cleanup_mail.sh
Integrating Jenkins
-
Now Create a file named Jenkinsfile at the root of Git Repo and add following lines to file
pipeline {
    agent { label 'local' }
    environment {
        ENV_PROJECT_NAME = "arpansahu_one_scripts"
    }
    stages {
        stage('Initialize') {
            steps {
                script {
                    echo "Current workspace path is: ${env.WORKSPACE}"
                }
            }
        }
        stage('Checkout') {
            steps {
                checkout scm
            }
        }
    }
    post {
        success {
            script {
                // Retrieve the latest commit message
                def commitMessage = sh(script: "git log -1 --pretty=%B", returnStdout: true).trim()
                if (currentBuild.description == 'DEPLOYMENT_EXECUTED') {
                    sh """curl -s \
                    -X POST \
                    --user $MAIL_JET_API_KEY:$MAIL_JET_API_SECRET \
                    https://api.mailjet.com/v3.1/send \
                    -H "Content-Type:application/json" \
                    -d '{
                        "Messages":[
                                {
                                        "From": {
                                                "Email": "$MAIL_JET_EMAIL_ADDRESS",
                                                "Name": "ArpanSahuOne Jenkins Notification"
                                        },
                                        "To": [
                                                {
                                                        "Email": "$MY_EMAIL_ADDRESS",
                                                        "Name": "Development Team"
                                                }
                                        ],
                                        "Subject": "Jenkins Build Pipeline your project ${currentBuild.fullDisplayName} Ran Successfully",
                                        "TextPart": "Hola Development Team, your project ${currentBuild.fullDisplayName} is now deployed",
                                        "HTMLPart": "<h3>Hola Development Team, your project ${currentBuild.fullDisplayName} is now deployed </h3> <br> <p> Build Url: ${env.BUILD_URL}  </p>"
                                }
                        ]
                    }'"""
                }
                // Trigger the common_readme job for all repositories"
                build job: 'common_readme', parameters: [string(name: 'environment', value: 'prod')], wait: false

            }
        }
        failure {
            sh """curl -s \
            -X POST \
            --user $MAIL_JET_API_KEY:$MAIL_JET_API_SECRET \
            https://api.mailjet.com/v3.1/send \
            -H "Content-Type:application/json" \
            -d '{
                "Messages":[
                        {
                                "From": {
                                        "Email": "$MAIL_JET_EMAIL_ADDRESS",
                                        "Name": "ArpanSahuOne Jenkins Notification"
                                },
                                "To": [
                                        {
                                                "Email": "$MY_EMAIL_ADDRESS",
                                                "Name": "Developer Team"
                                        }
                                ],
                            "Subject": "Jenkins Build Pipeline your project ${currentBuild.fullDisplayName} Ran Failed",
                            "TextPart": "Hola Development Team, your project ${currentBuild.fullDisplayName} deployment failed",
                            "HTMLPart": "<h3>Hola Development Team, your project ${currentBuild.fullDisplayName} is not deployed, Build Failed </h3> <br> <p> Build Url: ${env.BUILD_URL}  </p>"
                        }
                ]
            }'"""
        }
    }
}
Note: agent {label 'local'} is used to specify which node will execute the jenkins job deployment. So local linux server is labelled with 'local' are the project with this label will be executed in local machine node.
-
Configure a Jenkins project from jenkins ui located at https://jenkins.arpansahu.me
Make sure to use Pipeline project and name it whatever you want I have named it as per great_chat

In this above picture you can see credentials right? you can add your github credentials and harbor credentials use harbor-credentials as id for harbor credentials.
from Manage Jenkins on home Page --> Manage Credentials
and add your GitHub credentials from there
-
Add a .env file to you project using following command (This step is no more required stage('Dependencies'))
sudo vi /var/lib/jenkins/workspace/arpansahu_one_script/.env
Your workspace name may be different.

Add all the env variables as required and mentioned in the Readme File.
Now you are good to go.
License
This project is licensed under the MIT License. See the
LICENSE
file for details.
Documentation
Environment Variables
To run this project, you will need to add the following environment variables to your .env file
SECRET_KEY=
DEBUG=
ALLOWED_HOSTS=
MAIL_JET_API_KEY=
MAIL_JET_API_SECRET=
AWS_ACCESS_KEY_ID=
AWS_SECRET_ACCESS_KEY=
AWS_STORAGE_BUCKET_NAME=
BUCKET_TYPE=
DOMAIN=
PROTOCOL=
DATABASE_URL=
REDIS_CLOUD_URL=
SENTRY
SENTRY_ENVIRONMENT=
SENTRY_DSH_URL=
deploy_kube.sh requirements
HARBOR_USERNAME=
HARBOR_PASSWORD=